Exporting and sharing events
Introduction
Artshell's event export and sharing system lets you easily share your events via email, links, or a PDF calendar or an Excel file.
Within each sharing option, you'll find toggles— buttons that you can turn on or off to include or exclude specific features or associated details.
Watch the short explanatory video below:

Select events to export and share
Both exporting and sharing begin with the Event Selection by clicking the icon . For a more detailed explanation of this feature, see the article "Introduction to the Events Section."
Once you've selected the events, the " Manage" panel automatically appears on the right, containing sharing and export options.
If the panel does not appear (for example, because of a small screen size), click the icon top right:

This article focuses on the first option in the Manage panel, Export

It allows you to:
- Share events online (via link or email)
- Export events to an Excel file
- Share events in a PDF calendar
Share events online
After selecting the events you want to share, choose either " Link " or " Email."
Click on the titles below to expand them:
Share via Link
The "Share via Link" feature allows you to share selected events via a public link that is visible to anyone who has the URL.

Use the options on the left to explore the various sections and customization settings. Specifically:
General Settings
Choose the language, customize the text that will appear in the link (title and introductory text), and decide which elements to include: your logo at the bottom of the linked web page and—if you've set up multiple locations in the Organization's Offices section—the specific location to display.
Metadata
Customize the title, description, and image that will be displayed when your link is shared in chats, on social media, or on other websites.

Event details
Use the switches to enable or disable specific fields, such as curator, links, and other information. This allows you to choose which data from the selected events to include in the link.
Days and times
Use the switches to enable or disable specific fields, such as curator, links, and other information. This allows you to choose which data from the selected events to include in the link.
Images and videos
Use the toggles to choose whether to include the cover image and secondary images or videos. If you prefer, you can further customize your selection by clicking directly on the media items listed to include or exclude them.
Folders
Select the folders and attachments you want to include in the link.
File
Select the files you want to include in the link.
Artworks Data
Use the toggles to enable or disable specific fields, such as acquisition, rights and restrictions, and other information. This allows you to choose which details of Artworks with the selected events to include in the link.
Share via Email
If, on the other hand, you'd prefer to send your upcoming events via email, from the dashboard Manageclick Export and then select the second option, Email.
Customize the information to include in your email:
General Settings
Choose which elements to include, such as: your logo at the top of the email and—if you've set up multiple locations in the Organization's Offices section—the specific location to display at the bottom of the email.
Event details
Use the toggles to enable or disable specific fields (such as organizer, link, etc.). This allows you to choose which information from the selected events you want to include in the email.
Days and times
Use the toggle switch to include data related to days and times, and then select them in more detail.
Images and videos
Use the toggles to choose whether you want to include the cover image and the secondary images and videos. If you prefer, customize your selection by clicking directly on the listed images and videos to include or exclude them.
Folders and Files
Select the folders, attachments, and files you want to include in the email. Next to each file, you'll see an icon indicating the file type, such as Word, PDF, Excel, etc.
 Once you've finished customizing, click on Create an email draft at the bottom right to proceed with creating the message. Enter the recipient, the sender, theSubject and finally Enter some text in the body of the email where indicated (Enter your text here...). If the recipient isn't in your Artshell address book, click the + to add them. If you don't see the sender's address in the drop-down menu or if it can't be selected, check to make sure the address has been added and enabled in the Email settings.
 Once you have filled in all the fields, click the button Send email.
Event Cover Dimensions and Format
When you share your event online as a link or via email, it's also important to keep in mind what the end user sees. Here's how the cover image will appear on a computer screen.

Choose the right cover image.
Keep in mind that your event may be viewed on mobile devices or on screens of different sizes. Avoid images that contain text, and if there are figures in the image, place them in the center.

Export events to Excel
Click the Excel option, then configure the export options:
- the name of the document;
- the language;
- What information to include when enabling the switches.
Each switch corresponds to a sheet in the Excel file. By toggling the switches, you can include the following data:
- Details: Includes basic information about the event (e.g., title, subtitle, curator, full venue details, etc.).
- Activities: that is , any "mini-events" within the main event.
- Link
- Artworks
- Folders
- File
- Images and Videos
Finally, click the " Generate Excel " button to download the file.
Export participant data:
This type of Excel export for the event does not include information about attendees. To learn how to export attendee data and any +1 guests (if you have enabled them), see the dedicated article: Import Attendees and Guests from Events to Your Contacts Section.
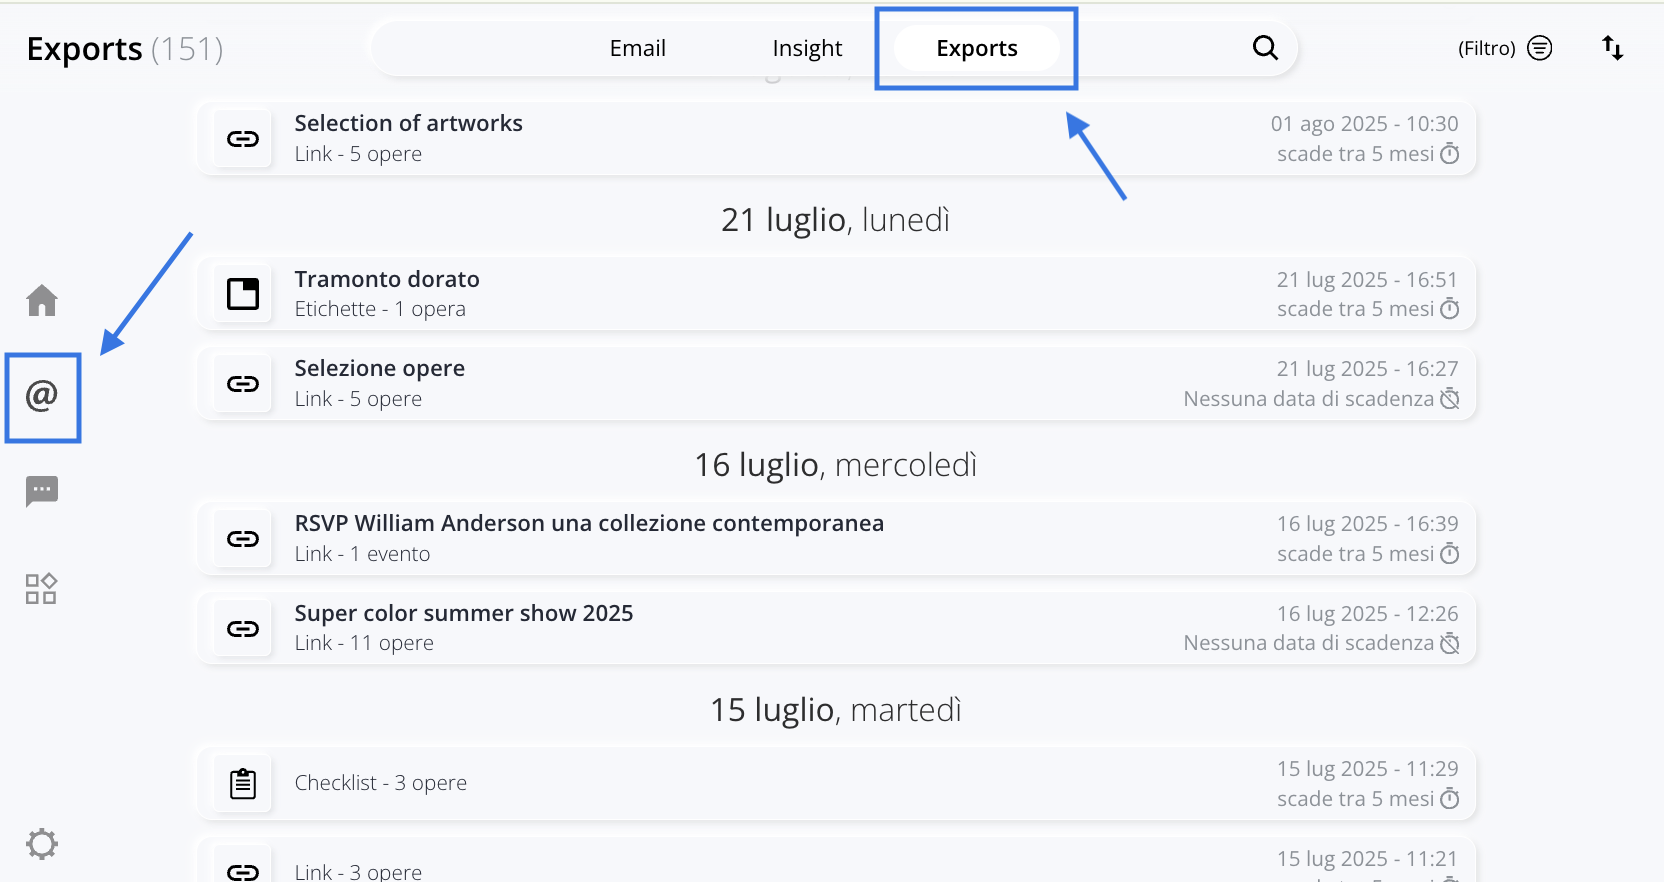
Where to Find the Generated Exports
All generated exports can be found in the Export section, which you can access by clicking the @ icon in the left-hand side menu.
In addition to the Export section, links can also be viewed and managed directly from record by clicking the green button Onlinebutton. From this section, however, editing options are limited: you can only copy the link or delete it.

In the Export section, exports are sorted by creation date, starting with the most recent. Each export includes:
- The title of the export;
- The type: whether it is a link, an Excel record , a record , etc.;
- The number of elements (Artworks, events, Contacts, etc.) it contains;
- The date andtime of creation;
- How long until it expires?

By clicking on an export, you can view additional details and perform various actions, such as:

|
|
Synchronize the changes you've made. |
|
|
Copy the link. |
|
|
Open the link in a new window. |
|
|
|


Link Synchronization
After publishing a link, you may need to correct a typo, update some information, or modify data that’s already included in the shared version.
In these cases, you can use the "Synchronize" feature, which allows you to update the existing link without having to create a new one.
However, it is important to distinguish between:
- contentalready includedin the link at the time it was created;
- contentnot includedin the link's initial configuration.
The"Synchronize" feature updates only the content that was already shared in the original link. If, however, you want to add new fields, new sections, or content that wasn't initially selected, go to the next section of this article,"Edit Configuration," to learn how to modify the link's configuration.
From record
Use this mode if you need to correct or update information that is already included in a single event's link.
For example, if you want to change the title or subtitle previously shared in the link, open the record in edit mode, update theTitle or Subtitlefield, and clickSave.

Next, click the green"Online" button and select"Synchronize" to update the online version of the link.
From the Export section
Go to the Export section if you have edited multiple records and want to update the information already shared via the same link all at once.
In the search bar of the Export section, search for the link you're looking for, or use the filters to narrow down the results.

Once you've found the link, click Sync.
Edit settings
Use the " Edit Configuration " feature if you want to add content to the link that wasn't included when it was created, specifically content found in the " Details" tab, such as images, videos, folders, or files.
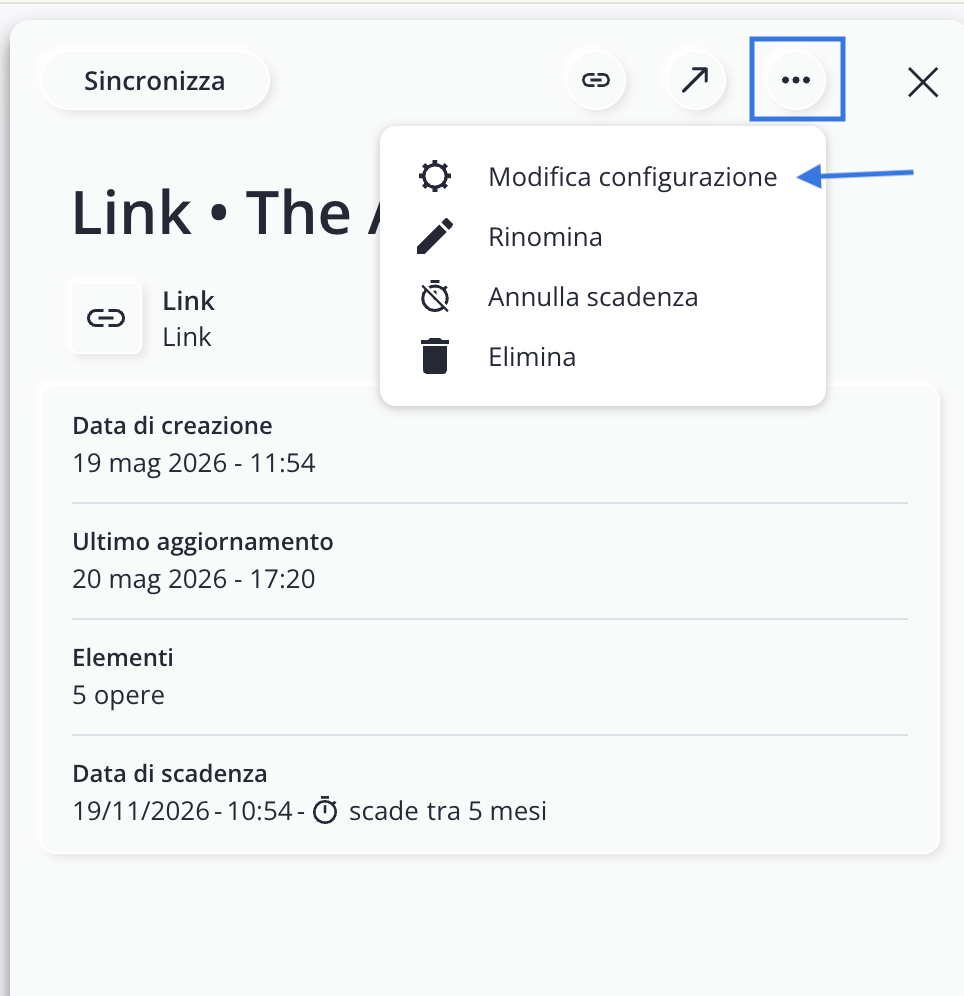
In fact, simple synchronization does not automatically add fields or sections that were not previously shared.
To change the settings, locate the link in the section Export, click the icon and select Edit settings. At this point, include the missing fields by selecting them manually or using the available toggles, then click Sync at the bottom right.
Clear the expiration date
Every type of export—whether it’s an Excel file, a link, or a document—hasa default expiration date of 5months. If your event lasts longer (for example, 6 months), be sure to remove the expiration date from the Export section. Once removed, the expiration date cannot be set again.

Conclusions
The event export and sharing features let you choose the format that best suits how you want to share your events each time: whether via an online link, email, an Excel file, or a PDF calendar.
Remember that, after creating an export, you can always manage it from the Export section: from there, you can copy its link, open it, sync any changes, modify its settings, rename it, cancel its expiration, or delete it.
Before sharing an event, always check which information you've included using the available toggles and verify the export expiration date, especially if the event lasts longer than 5 months.