Customize an email: add text, Artworks, events, and media
Introduction
Artshell provides you with all the tools you need to create personalized emails tailored to your every communication need. Learn how to format text, insert images, add events, and much more to make your emails more effective.
Before you begin, make sure you have all the necessary prerequisites so you can add content to your communication without any interruptions.
Prerequisites
- Read the introductory article " Create or Delete an Email."
- If you want to add a work to your post: make sure you've added at least one work in the Artworks section. If you haven't done so yet, read the article " Add, Edit, or Delete a Work" first.
- If you want to add an event to your announcement: make sure you've added at least one event in the Events section. If you haven't done so yet, read the article " Add, Edit, or Delete an Event" first.
Edit the text
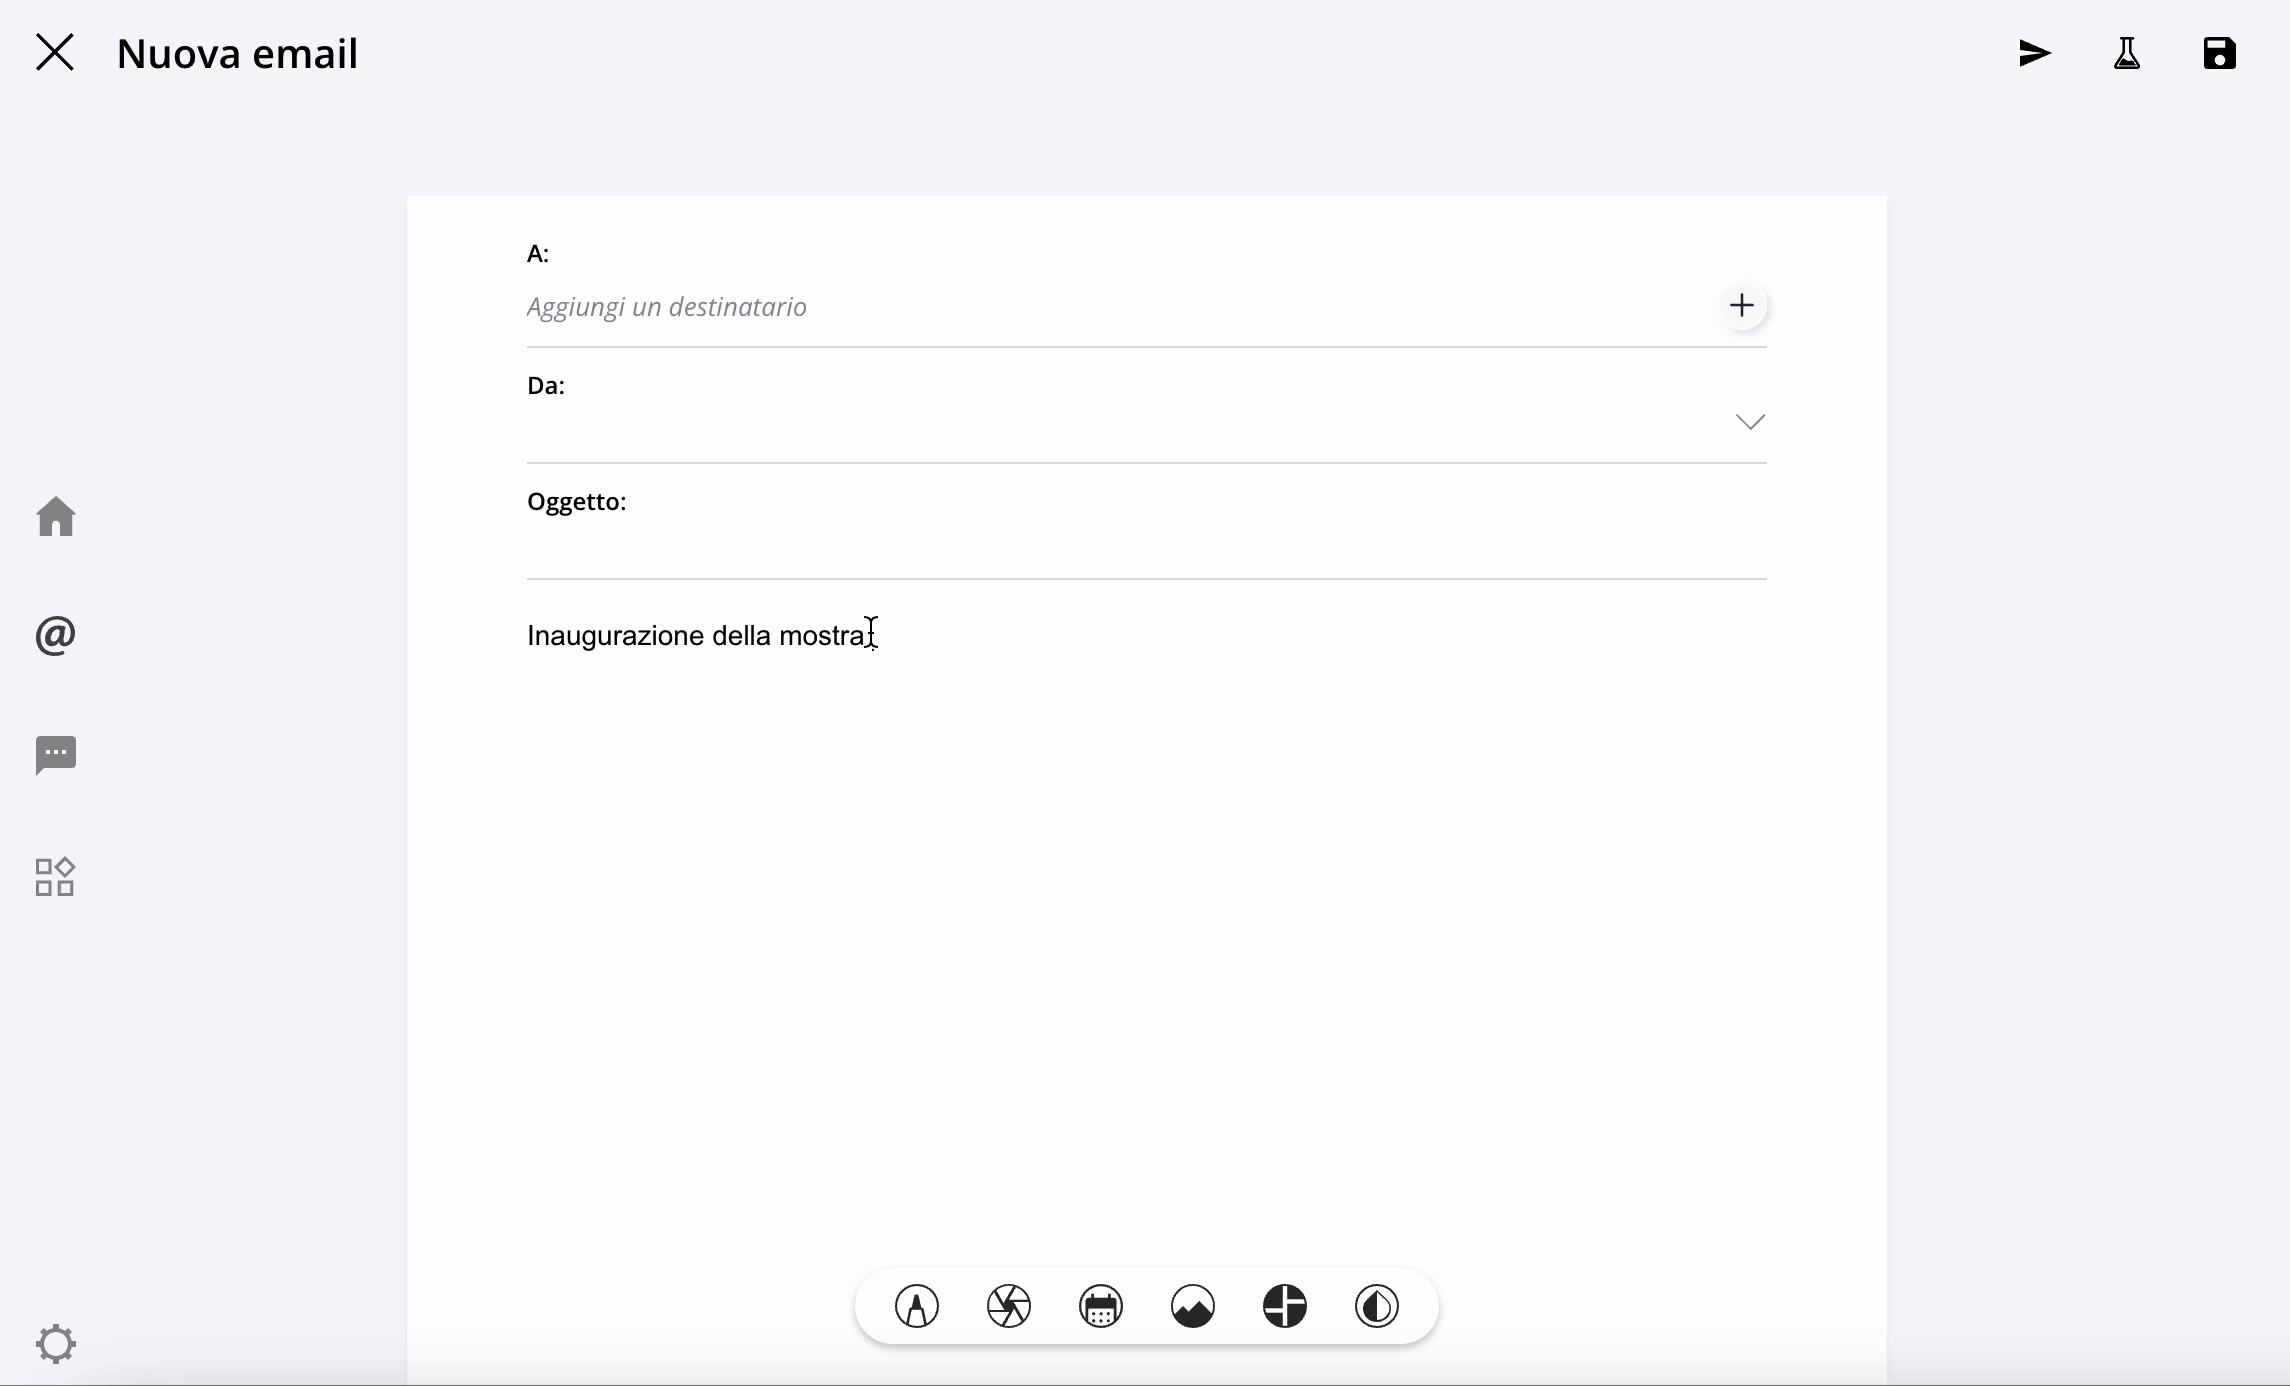
In the email, select the text you want to format so that the black menu with the text formatting options appears:

At this time, Artshelldoes not support custom fonts.Integrating an external font would require extensive technical testing to assess potential risks such as display inconsistencies, performance issues, or compatibility problems across browsers and devices. For now, the platform supports only fonts (more than 30) that have been certified and optimized to ensure reliability and stability.
To view details about the various menu features, click on each icon to expand it:
Text Color
Choose the color of the selected text. You can do this using the color picker or by entering a HEX code directly (e.g., #000000 for black).

Bold
Apply bold formatting to the selected text.

Italics
Apply italics to the selected text.

Font
Choose your preferred font and customize its size and line spacing.
When selecting a font, we recommend using a standard web font, as these are supported by all operating systems. Specifically, we recommend using: Arial / Courier / Georgia / Helvetica / Lucida Sans / Tahoma / Times New Roman.

Text Alignment
Align the text to the left, right, or center, or justify it. You can also adjust the indentation.

Add a link to the text
Add a link to the selected text by entering the URL in the field provided. Press ENTER on your keyboard to complete the link.

If, on the other hand, you want to Insert a link to an email address, in the URL field, first type the text mailto: 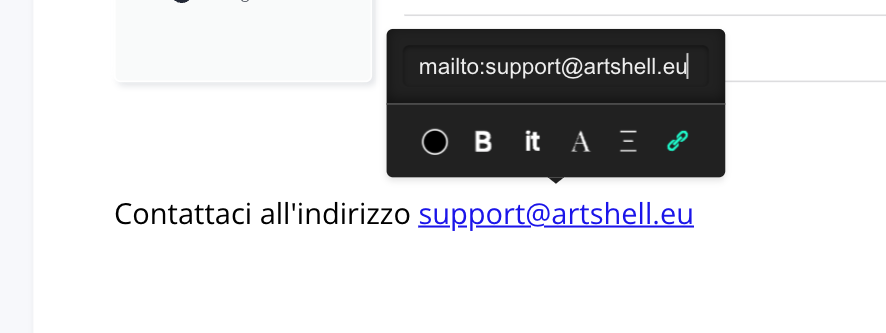
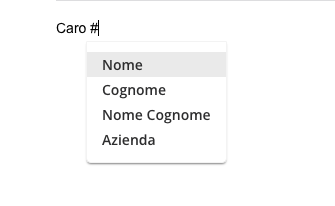
Personalize your email campaign:With Artshell, you can create a campaign in which each recipient receives a personalized email that includes their first name, last name, both, and more.
How?Add#where you want to insert the contact, and select what you want to insert from the drop-down menu.
Insert multimedia content
To insert multimedia content, click anywhere in the white area of the email: the second menu will automatically appear at the bottom center of the screen.

Click each icon to expand it and read the content:
Add item
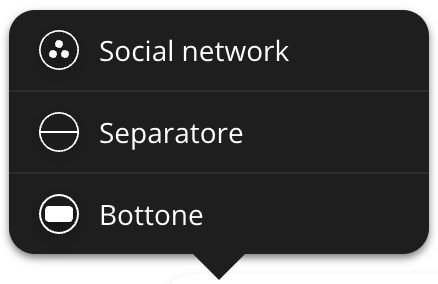
Social Media
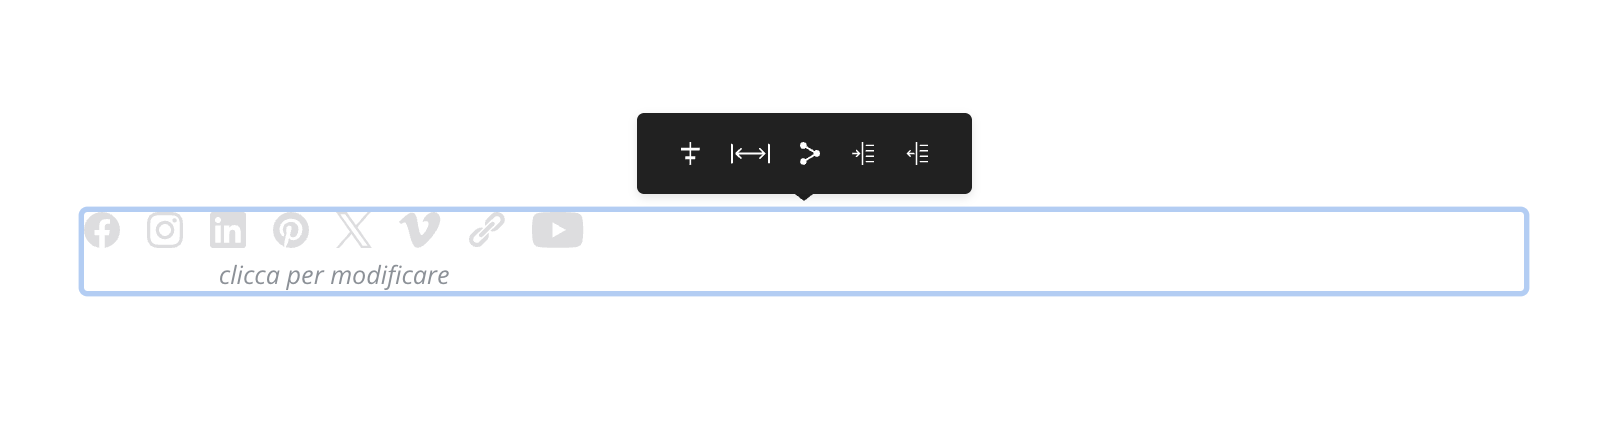
Add a social media box where your cursor is. The box appears in gray; click on it to open the formatting menu.
From the menu, you can configure the following options:
- Position: Place the social media box on the right, in the center, or on the left of the email.
- Spacing: Customize the distance between icons by choosing from 10px, 15px, or 20px, etc.
- Links: Type or paste the links to the social media accounts you want to display. To confirm each link, press Enter on your keyboard. Once you've entered a link, three icons will appear to its left: remove link, edit link, and open link in a new window. Leave the fields blank for social media accounts you don't have or don't want to include.
- Indentation: Choose whether to apply indentation to the box.
Separator
Insert a divider line into the email. Click the line to customize its color using the color picker or by entering a HEX code directly.
Button
Create a customizable button with text and external links. By default, the button appears as a black rectangle: click on it to open the formatting menu.
From the menu, you can configure the following options:
- Button color: Choose the button color using the color picker or by entering a HEX code directly, such as #000000 for black. You can also adjust the transparency of the selected color.
- Borders: Choose the color, transparency, and thickness of the button's borders.
- Shape: Define the shape of the button, from square corners to rounded edges. If you prefer, you can enter the radius manually.
- Text color: Choose the color of the text inside the button.
- Text: Choose the font, style, text size, line spacing, and the text to include on the button.
- Size: Set the button size by manually entering the vertical or horizontal spacing.
- Position: Choose where to place the button in the email: centered, right-aligned, left-aligned, or indented.
- Link: Add the link to make the button clickable and link it to an external page.
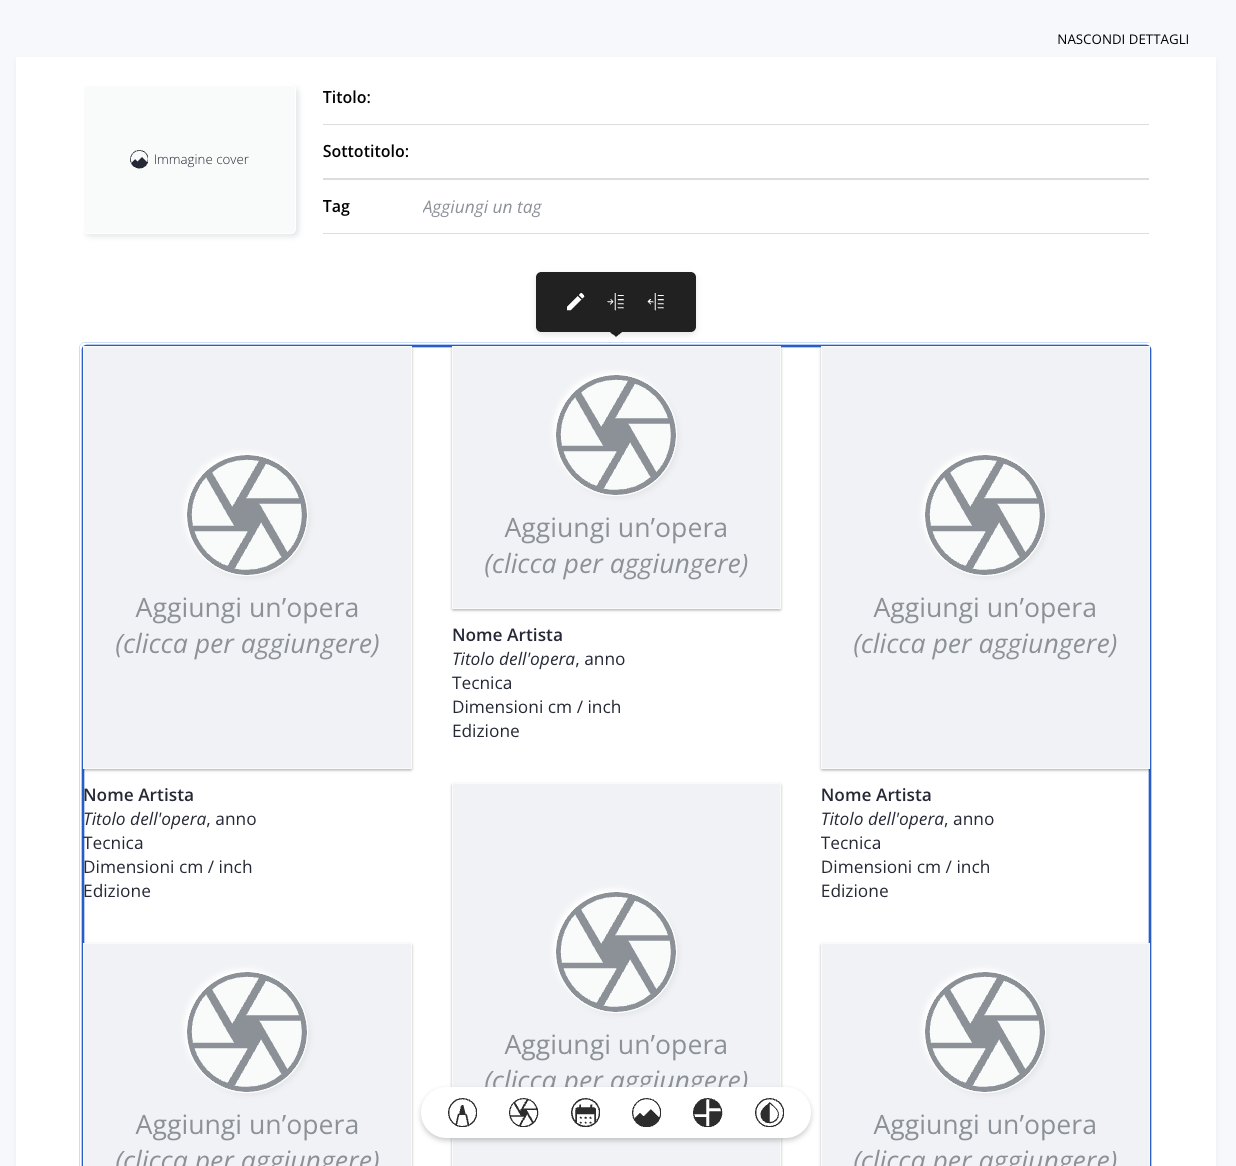
Add Artworks
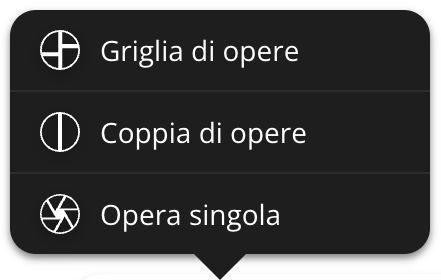
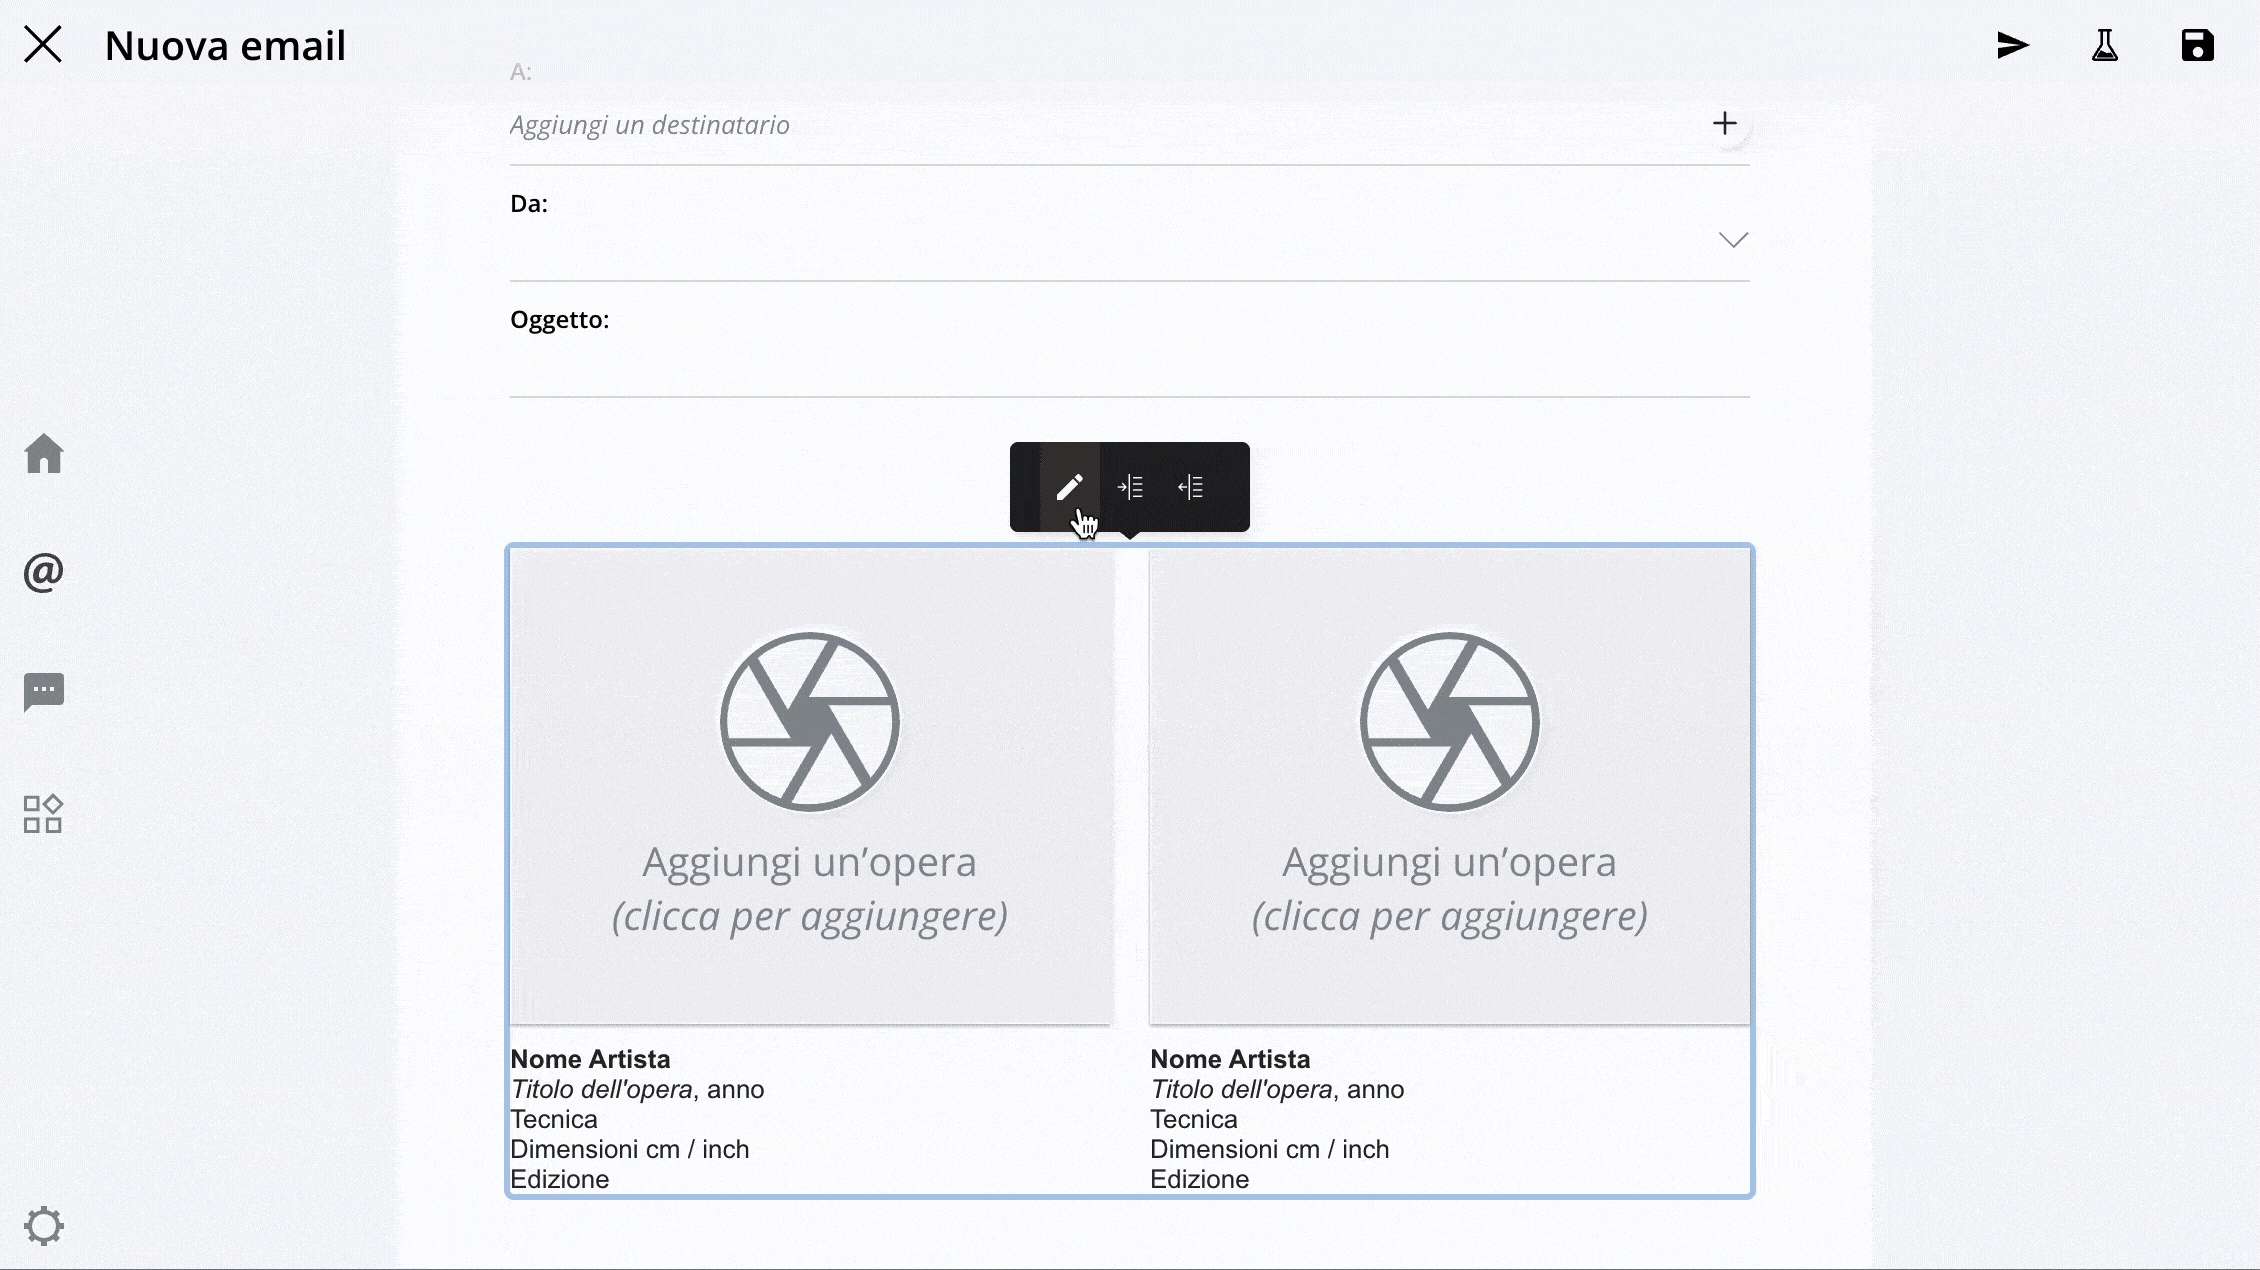
The " Artworks Grid," " Artworks Pair," and " Single Artwork " features allow you to include in your communication the Artworks available in the Artworks section of Artshell.
Step 1: Select the feature you want
Click the desired function to display the gray preview that you want to edit. Then click the preview to open the formatting menu.
The menu displays the icon and two indentation options, which let you customize the layout of the Artworks the email.
Step 2: Add the Artworks
Click the icon to open the sidebar on the right. From here, you can search Artworks or select the Artworks want to add to your post.
Step 3: Change the order of the Artworks
This feature is available only for the " Artworks Grid " and " Artworks Pair" functions.
After selecting the Artworks , click the green bar to view only the Artworks and change their order.
Step 4: Choose the content to include
Click "Add," then configure the content to include.
In "General Settings," select the language for the content. For example, if you're sending an email to a group of international recipients, you can enter the Artworks data Artworks English.
Select the information you want to display, for example:
- Artworks Data: Select the toggles to choose which information you want the end user to see when they click on the artwork in your communication.
- Price: Choose whether you want to include the price and whether you want to customize it without changing the price listed in the record .
- Images and videos: Use the toggles to choose whether you want to export the cover image and the secondary images and videos. If you prefer, customize your selection by clicking directly on the listed images and videos to include or exclude them.
- Folders and Files: Select which folders and attachments you want to include in the link. Also select which files you want to include in the link. Next to each file, you'll see an icon indicating the file type—Word, PDF, Excel, etc.
Step 5: Finish adding the Artworks
Click "Continue" to finish adding the Artworks.
Use the indentation icons to customize the layout of Artworks the text of your message.
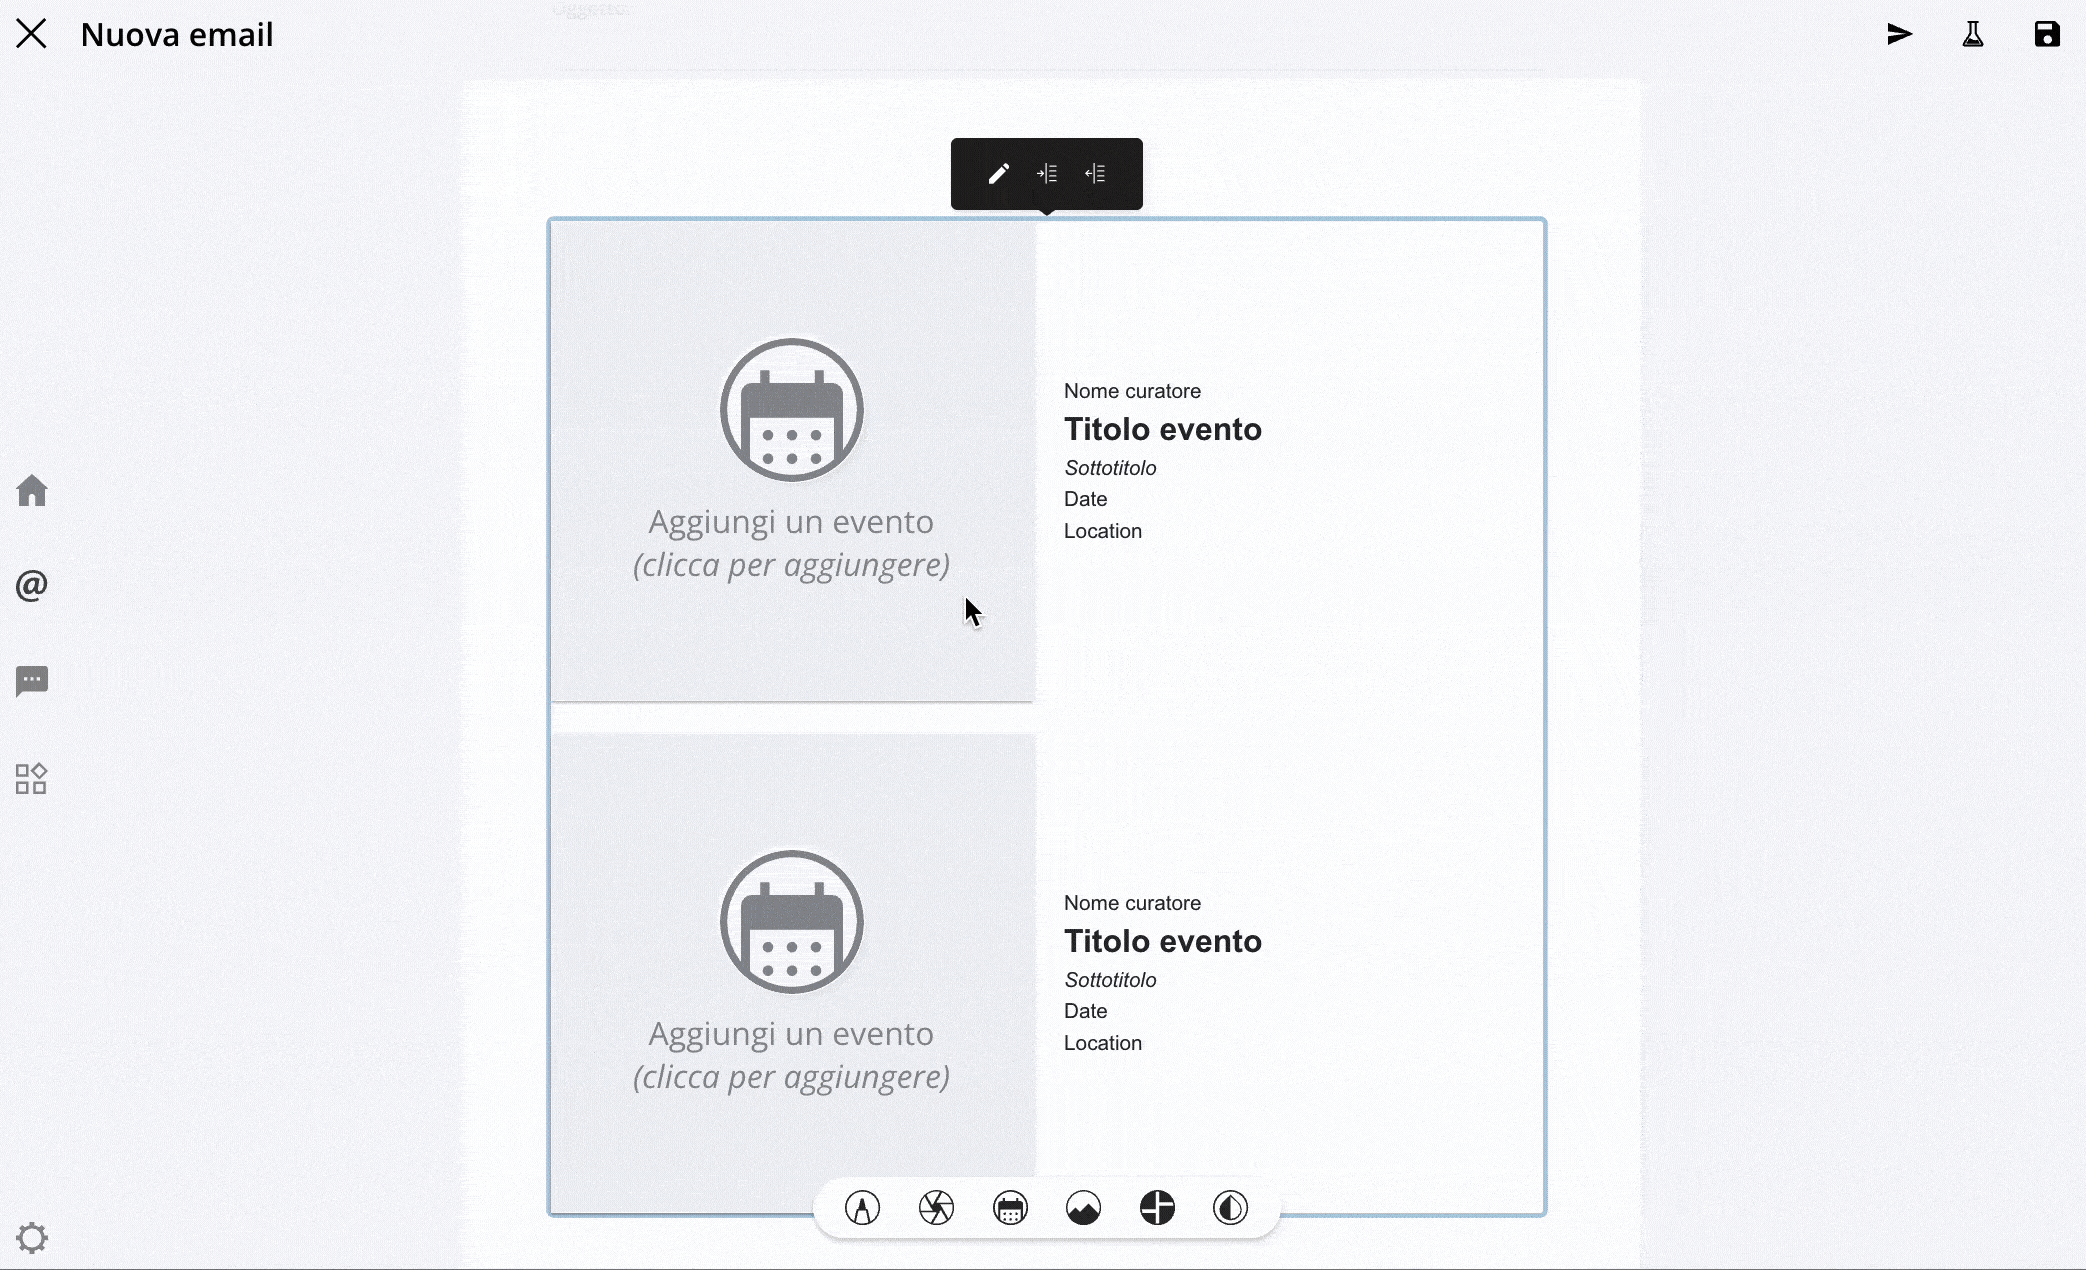
Add events
With Artshell, you can add events to your communications. Select this option to see the gray preview that you can edit:

Step 1: Select the feature you want
Click the desired function to display the gray preview that you want to edit. Then click the preview to open the formatting menu.
The menu displays the icon and two indentation options, which let you customize the layout of the Artworks the email.
Step 2: Add the Artworks
Click the icon to open the sidebar on the right. From here, you can search Artworks or select the Artworks want to add to your post.
Step 3: Change the order of the events
This option is available only if you select 2 or more events.
After selecting the events you want, click the green bar to view only the selected events and change their order.
Step 4: Choose the content to include
Click "Add," then configure the content to include.
In "General Settings," select the language for the content. For example, if you're sending an email to a group of international recipients, you can enter the event details in English.
Select the information you want to display, for example:
- Event Data: Use the toggles to enable or disable specific fields (such as curator, link, etc.). This allows you to choose which information from the selected events you want to include in the link.
- Days and times: Use the toggle switch to include data related to days and times, selecting them in detail as well.
- Images and videos: Use the toggles to choose whether you want to export the cover image and the secondary images and videos. If you prefer, customize your selection by clicking directly on the listed images and videos to include or exclude them.
- Folders and Files: Select which folders and attachments you want to include in the link. Also select which files you want to include in the link. Next to each file, you'll see an icon indicating the file type—Word, PDF, Excel, etc.
- Artworks Data: Use the toggles to enable or disable specific fields (such as acquisition, rights, and restrictions, etc.). This allows you to choose which details of Artworks—associated with the selected events—to include in the link.
Step 5: Finish adding the events
Click "Continue " to finish adding events.
Use the indentation icons to customize the layout of the events within the text of your message.
Add media: files, videos, and images

Add media to your message using the corresponding icon, and choose whether to upload Files, Videos, or Images.
File:Below, you'll see how to add a file to your message.

Video:
Below, you'll see how to add a video to your post.

In this case, a previously uploaded video was used; if you prefer, you can also use the link feature and add a video from Vimeo or YouTube. Select the icon and paste the link to the entry Video link.
Images:Below, you'll see how to manage an image in your communication. The upload process is the same as the one shown for files and videos.

Add complex media
It allows you to add a box consisting of an image flanked by text and an image slider.
Images and Text:Once you've selected the "Image and Text" option, click the gray preview to bring up the formatting menu. At this point, you can:
- Customize the color and transparency of the text background.
- Add an image, blur it, swap its position with the text, or resize it to fit inside the box.
- Manage text color.
- Select the font, style, size, and line spacing, then enter the text.
- Control the position of the text within the box and the indentation of the entire box on the page.
- Set the dimensions of the box.
Edit Style
From here, you can control the style and layout of the entire email.

Conclusions
Now that you know how to customize and manage the content of your communications, you can read more advanced articles and get the most out of this section: