
Create an email or newsletter
Introduction
Artshell lets you create both emails addressed to one or more Contacts and newsletters to send to groups of recipients.
In this guide, you'll learn how to create a new message, select senders and recipients, enter the subject and message content, and save the draft.
Important: In Artshell , a recipient corresponds to an email address, not to record . If a contact has two active email addresses, the system treats them as two separate recipients.
Before You Begin
Before creating a new message, make sure you have completed these steps:
- have verified at least one sender email address;
- have entered at least one contact with a valid email address;
- have set up the link to the Privacy Policy in your account settings;
- to have correctly configured the domain's DNS settings.
If this is your first newsletter, we also recommend that you read:
Create a new email or newsletter
Step 1: Create a new message
Click the Click in the upper-right corner to create a new email or newsletter. A new blank document will open where you can enter all the details of the message.
Step 2: Fill in the main fields
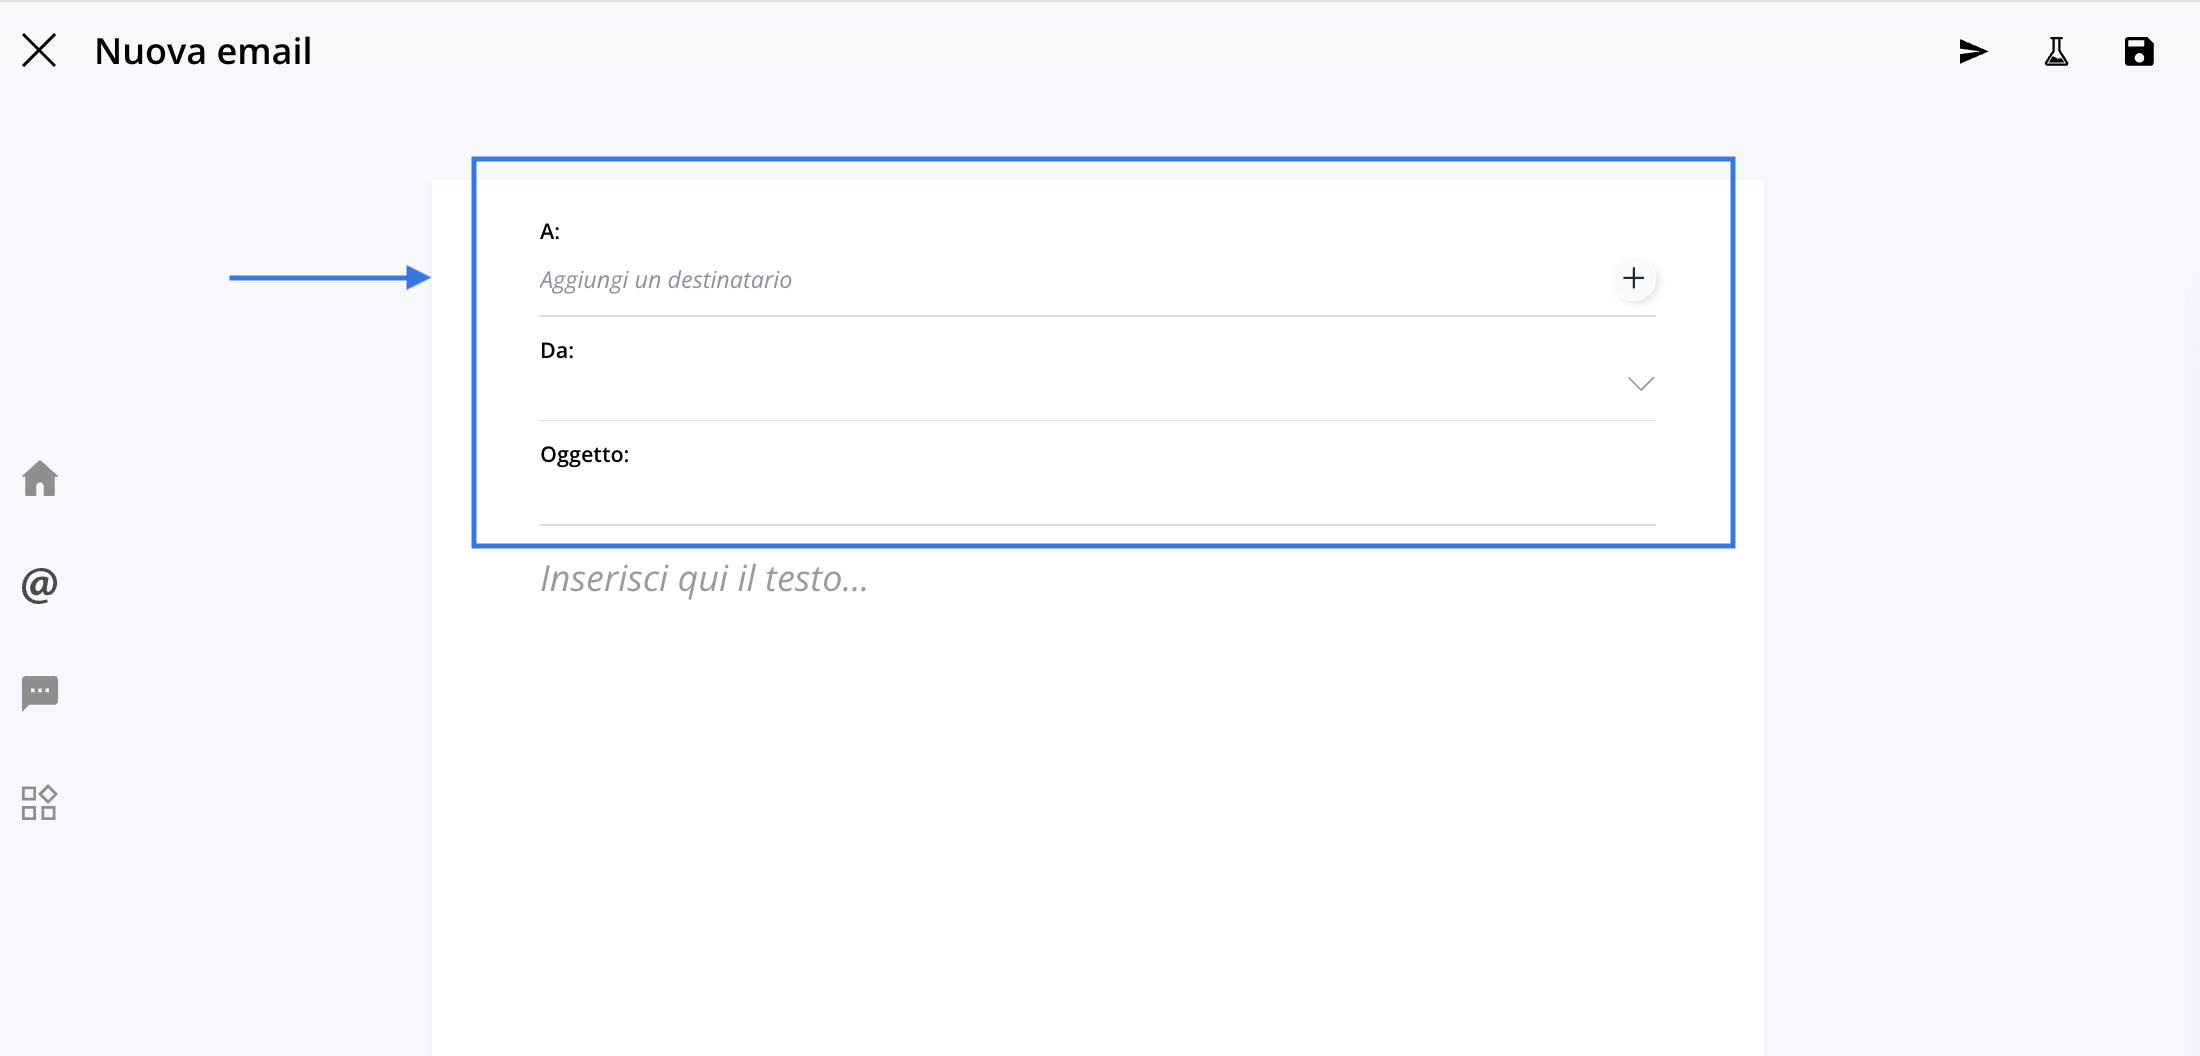
Expand the various fields to configure the communication.
Recipients - To:
Enter the recipient or recipients recipients of your message. Click Add a recipient to open the drop-down menu from which you can select the email addresses to which you want to send your message.
If you've already populated your Contacts section Contacts tags and lists, you'll see a few options appear before the email addresses, namely:
- "All Contacts " lets you send your message to Contacts your address book.
- Tags: allows you to select one or more tags as email recipients.
- From your lists, you can select a list that you created manually.
- Automatic lists: You can select an automatic list.
You can also start typing the email address of the person or company you want to contact to see results containing the search term appear immediately.
If, on the other hand, the email address has not yet been entered in Artshell You can click the to open the record and fill in the fields. This new contact is automatically saved in the Contacts section.Sender - From:
Select the email address from which you want to send the message. Sender addresses can be configured in the Email Settings in Settings panel (
). If you want to enter a different sender address Read this article to set up additional email addresses.
Subject:
Specify the subject of your message. The subject line is one of the factors that influence email open rates. For some tips on how to write effective subject lines, see the article: Best Practices for Emails and Newsletters.
Step 3: Write the content
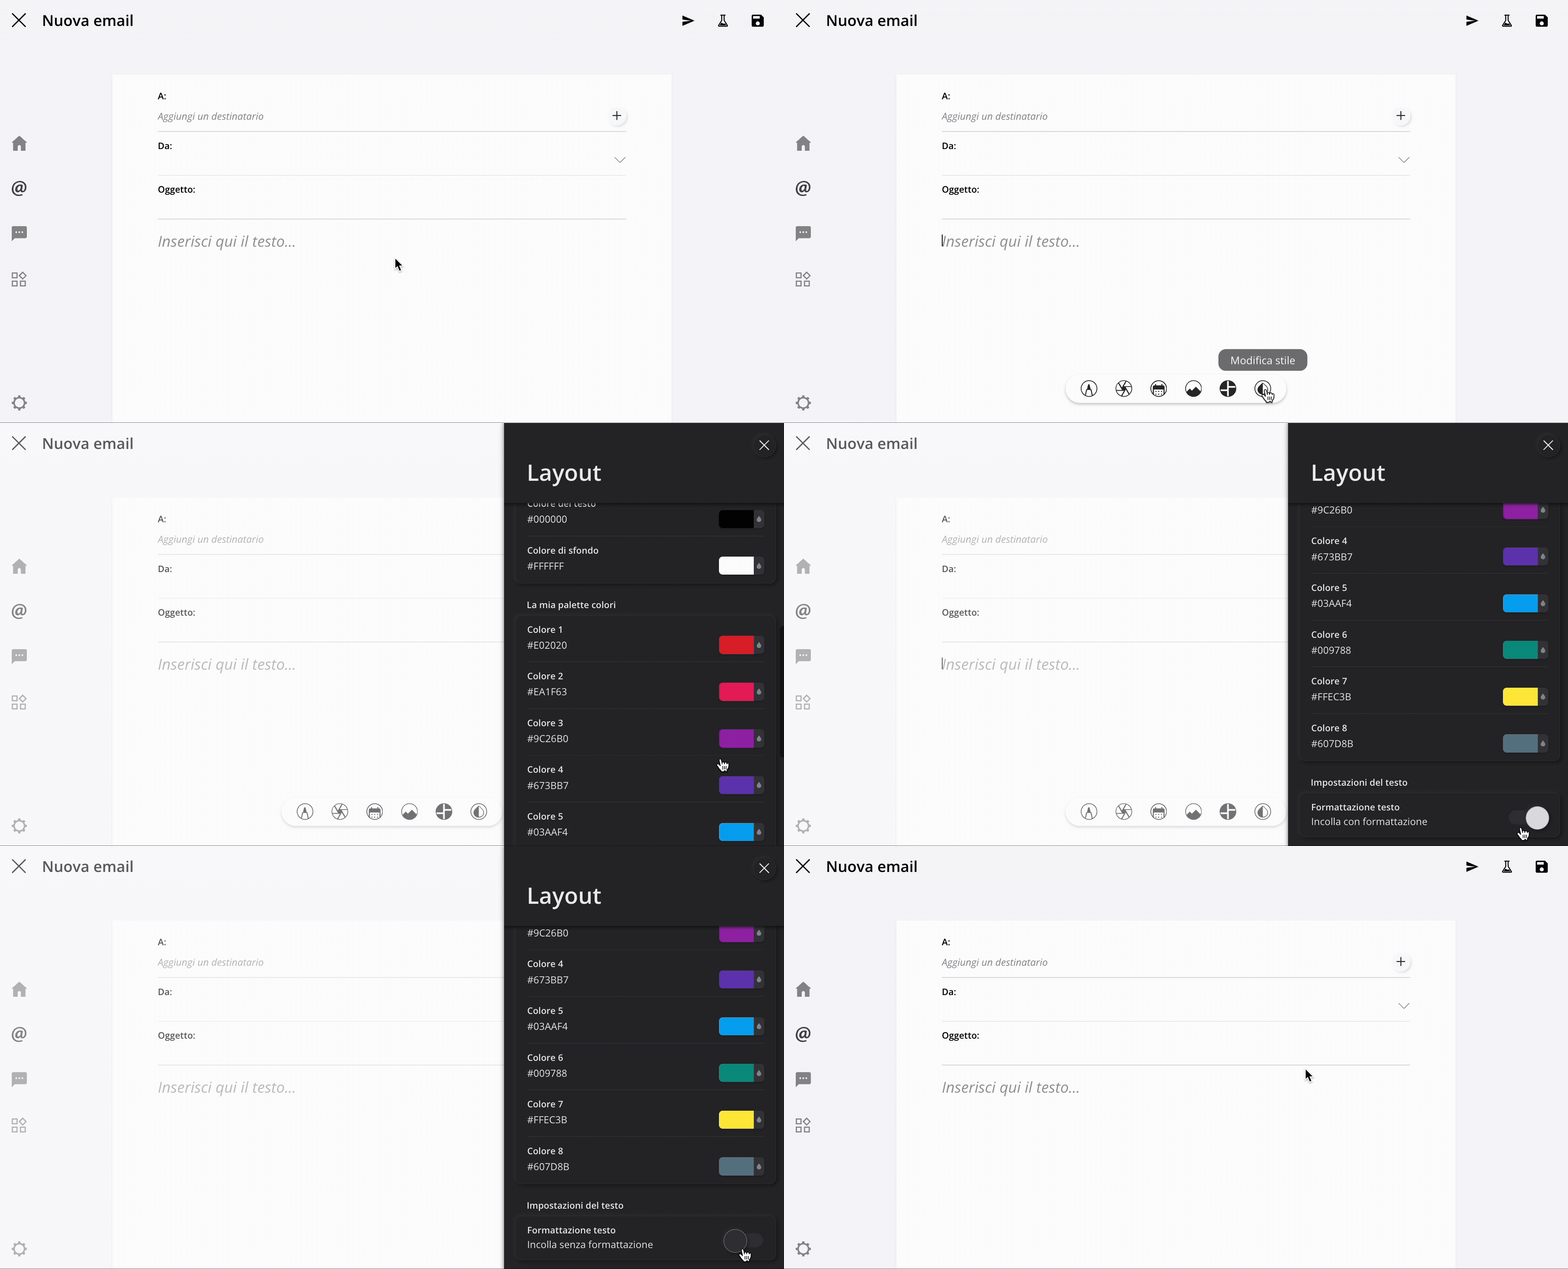
To write the text of your message, click Enter text here... or anywhere on the blank page and start typing your text. Alternatively, you can paste text that you have previously copied from other files (such as Word or PDF) or web pages.
Note:Artshell always pastes previously copied text inplain text mode, so the pasted text always appears "plain" (without fonts or specific colors). You can manage the option to paste with or without formatting fromthecentralformatting menuby selecting"Edit Style."
Watch the short video below:
Step 4: Save the message
When you're done, click the icon Save Click the button in the upper right corner to save your new message.
Before Sending
Before sending a newsletter, make sure that:
- the sender is correct;
- the recipients are the intended ones;
- the subject is clear;
- the content is complete.
Note: All newsletters sent through Artshell automatically include an "Unsubscribe " link in the footer.
Recipients can use this link to unsubscribe from the newsletter at any time. When a contact uses this link, their email address is automatically marked as " Unsubscribed, " and they will no longer receive newsletters, though they will remain in your address book.
Delete an email or newsletter
Open the email or newsletter you want to delete. Select the icon in the upper right corner, then click Delete email.
If you want to proceed with deleting the message, click Delete again; otherwise, select Cancel.
Conclusions
Now you know how to create a new email or newsletter in Artshell.
To round out this post, you can check out these articles: