Newsletter: Get the Most Out of Your Mailing List
Introduction
In this article, we'll show you how to set up your account to collect newsletter subscriptions and properly manage email communications.
One of the first steps you should take to build a solid mailing list and present your organization in a professional manner is definitely to create a effective sign-up form . Artshell allows you to create the sign-up form directly within the software and link it to your website (as well as to your email signature or social media bio link) via a simple link, without having to create and add a dedicated section. Anyone who subscribes to your newsletter through this form will also be automatically added to the Contacts section of Artshell.
To effectively manage your communications, it is also essential to know how your Contacts responding to your newsletters and, therefore, to understand the status of Contacts.
Newsletter Sign-up Form
The newsletter sign-up form can be set up in two ways: usingArtshell’s built-in option, or by connecting a form on your website to the Contacts sectionvia API.
Before you start customizing your newsletter sign-up form, make sure to:
- Make sure you've verified the email address you want to use to send your newsletters.
- You have added the link to the privacy policy in the Privacy & Policy field within the Settings panel.
- A disclaimer message has been added to the sender's email.
Configure the Artshell internal form
Step 1: Enable the form
Access the settings panel by clicking the icon , and select the option Newsletter sign-up form. Toggle the switch to expand the section and begin setup.
Step 2: Customize Style & Layout
In the Style & Layout section, you can customize the module’s appearance: upload a logo, change colors and fonts, customize the button text, and set a redirect link if desired. Here you can also write the thank-you message that will be displayed to the user once they have completed registration.
Step 3: Set the Subscription Tag
In the Structure & Data section, you can set the tag that will be automatically assigned to new subscribers, such as #newsletter_subscription.
This tag will be visible in record and will allow you to easily identify who signed up through the form.
Step 4: Enter the link to the privacy policy
If you have already entered the link to your privacy policy in the Settings panel under " Privacy & Policy," the field will be filled in automatically. Otherwise, you will need to paste it manually.
Why is it mandatory to have a privacy policy?You can find more information inthis article from Iubenda.
How to get the link to your privacy policy:
To paste the link to your privacy policy, you can upload the document to Google Drive or use the Medialibrary . If you want to use the Medialibrary, follow these steps:
- In the section Contactssection, create a record with the name of your organization, such as "Gallery XYZ. "
- Open the Details tab and select File.
- Click the to select the privacy policy document you want to include in the File.
- If the document is not yet in the Medialibrary, click the to import it from your computer. Be sure to give it a clear name, for example "Privacy Policy 2025", so you can find it quickly in the future.
- Once it has been uploaded to Medialibrary, select it and click the "Add " button at the top.
- Click the icon and select the second option Copy to clipboard.
- Go back to the Settings panel, under " Newsletter Subscription Form," and paste the link into the "Privacy Policy Link" field.
Step 5: Use the form link
Once the setup is complete, you can copy the form link from the "Registration Form Link" section.
How and where to use the link to the registration form:
This link can be included inyour email signature,onyour social media profiles,converted into a QR code, orintegrated into your website as a dedicated page. If you’d like the integration to be more consistent with your website’s design, you can opt for an API-based solution. See the next section of this article to learn more.
Configure the Artshell internal form
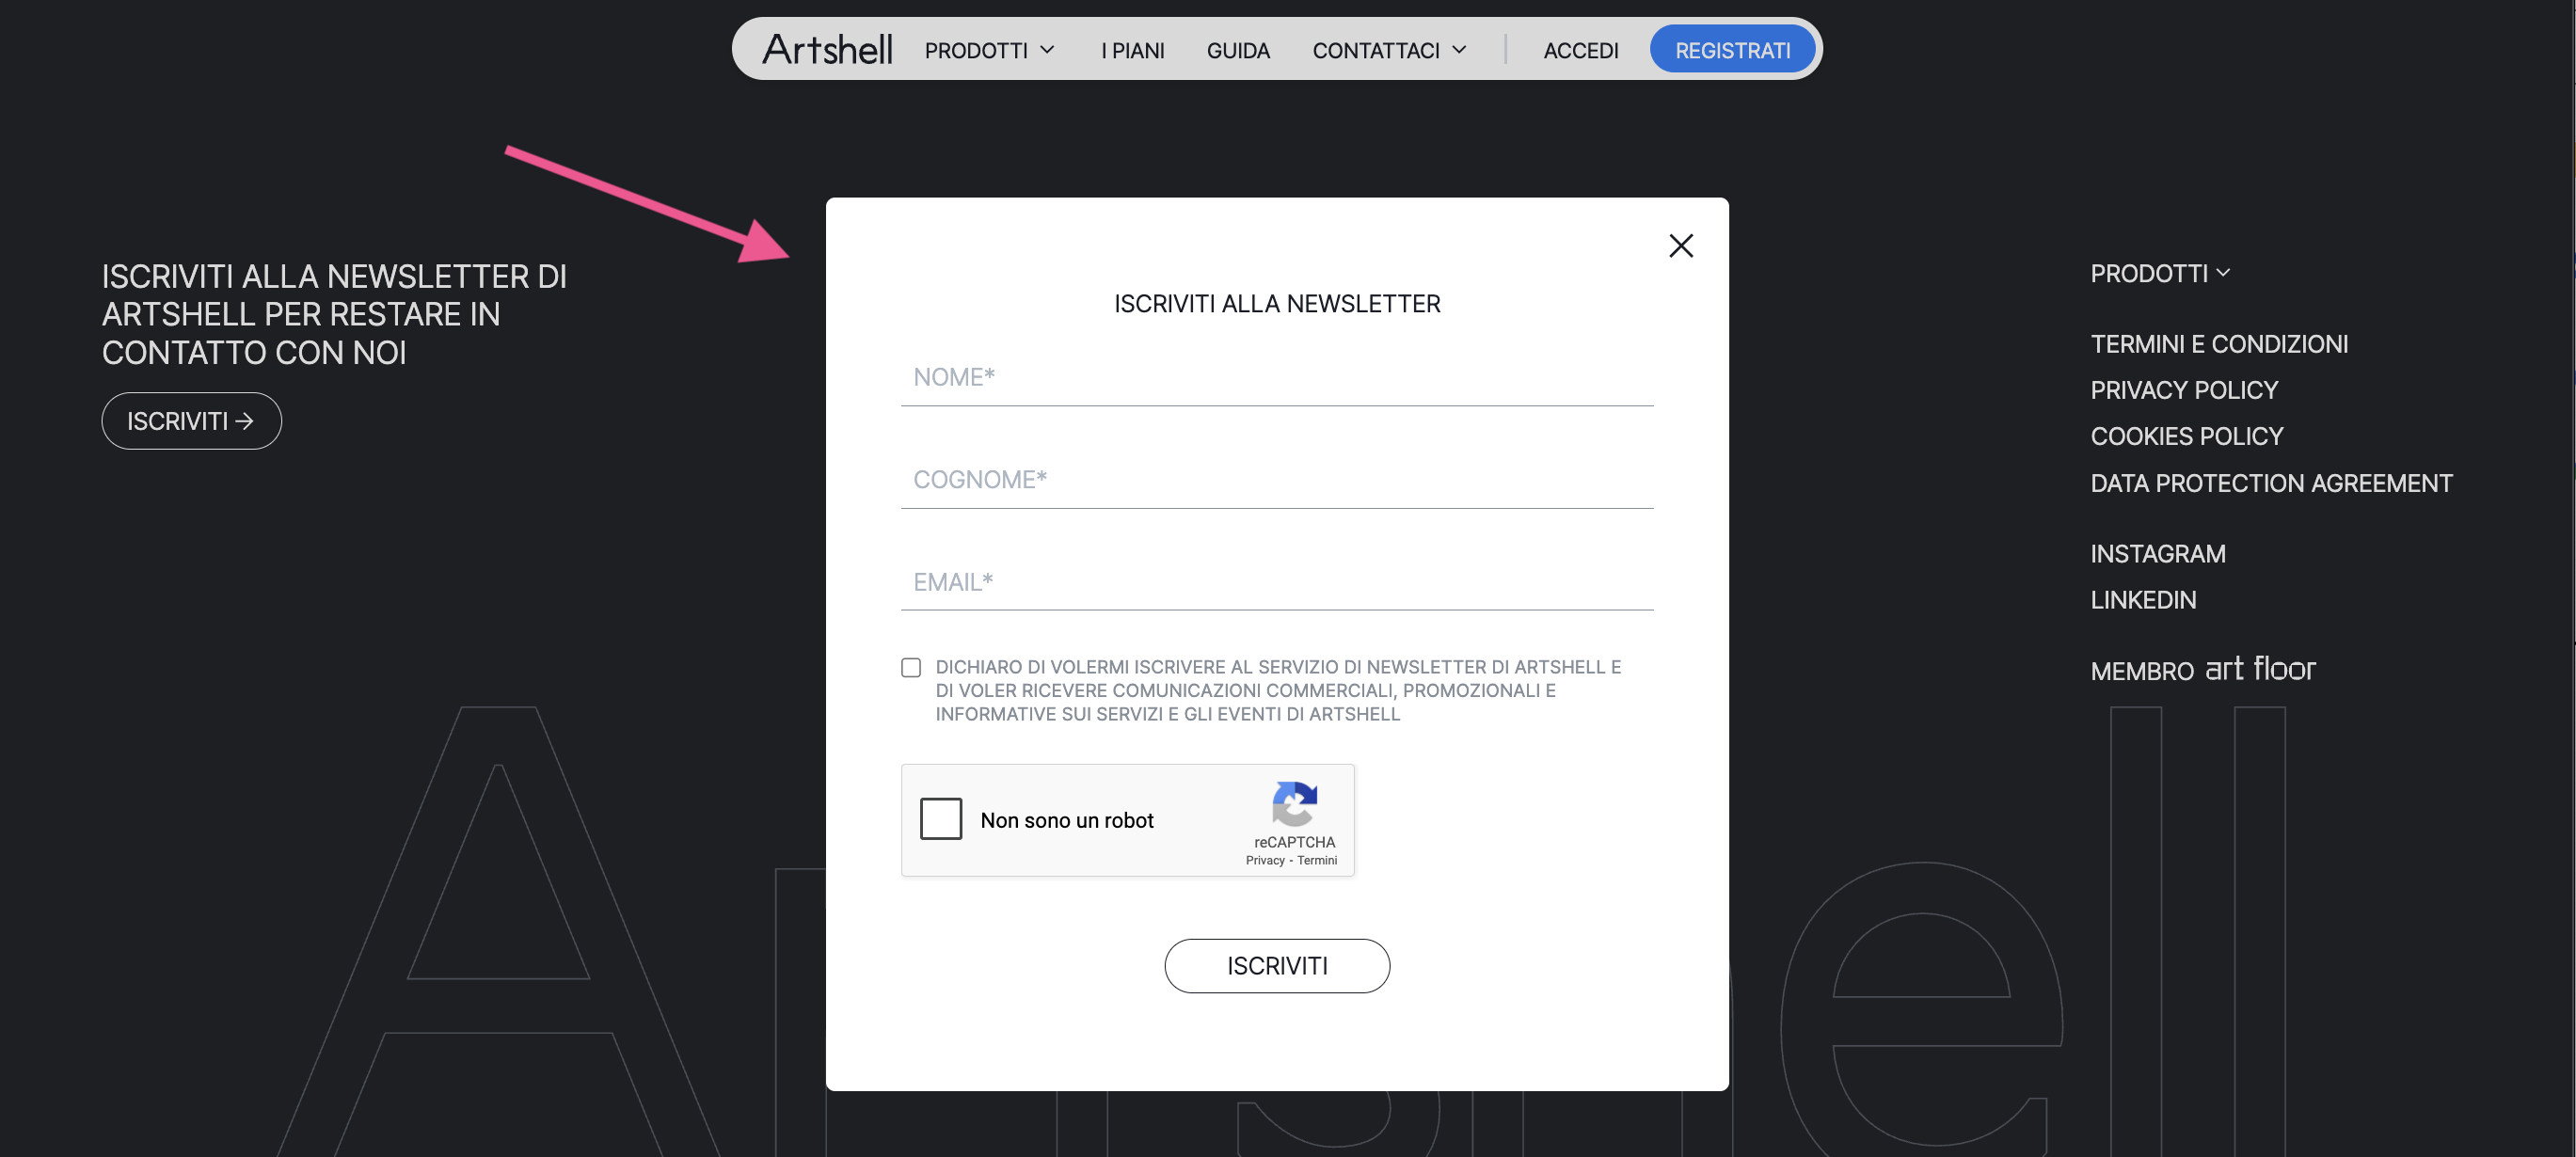
If you’d like a newsletter sign-up form that’s seamlessly integrated into your website, with custom graphics that match your brand, you can opt for integration via the REST API, creating a direct link between the form on your site and the Contacts section Contacts Artshell.
Below is an example of a custom integration, similar to the one featured on the Artshell website.
Available connection methods
Depending on your in-house technical expertise and your specific needs, integration can be carried out in two ways:
- Seamless integration via REST API
You can have your trusted developer handle the development; they can integrate the website form with Artshell using our REST APIs and the dedicated technical documentation. In this case, simply contact the Artshell Support team at support@artshell.eu to request the API documentation for the newsletter sign-up form.
- Custom integration developed by Artshell
If you’d prefer to have our team handle the development, you can request a quote for a custom integration by emailing sales@artshell.eu
The cost of development depends on several factors, including: the technology on which the site is built (e.g., WordPress, Shopify, custom PHP, Next.js, etc.), the number and type of fields to be connected, and the number of forms on the site. It is important to specify whether the forms are identical or different from one another in terms of structure.
To help us provide an accurate estimate, we ask that you provide this information when you submit your request.
Contacts Status: Active, Bounced, Inactive, and Unsubscribed
In Artshell, Contacts records Contacts tightly integrated with the Email and Newsletter section. Each contact has a status, indicated by a graphic symbol, that represents their eligibility to receive communications.
Below is an example of where the status is located in record sample record (in this case, it is " Active"):

When you enter a new address in the Contacts, the system automatically sets the status to Active, indicating that the contact is ready to receive emails and newsletters. However, the status may change depending on the contact’s interaction with your communications.
Why is status important?
When you send messages to a large number of Contacts via "All Contacts," tags, or lists), the email status acts as a filter, determining who will actually receive the emails.
The status of an email address can be:
Active)
Featuring the symbol . This is the default status when creating a new contact with an email address. The system sends emails and newsletters to active addresses.
Bounced
Featuring the symbol . These are the email addresses marked as "blocked"; they are formally correct, but rejected by the recipient's server. The system automatically excludes them from future mailings.
Email addresses classified as bounced are typically those that meet one or more of the following criteria:
- The email account has been closed, so the address is no longer active.
- Your inbox is full: the address has reached the storage limit for the inbox.
- Temporary errors not related to syntax: The recipient's mailbox has an error, but it is not due to a syntax error in the email address.
Note: An email address may be marked as " bounced " even if no messages have yet been sent from that account.
To protect the reputation of sender domains and improve the quality of mailings, Artshell takes into account the technical delivery status of email addresses as detected by the platform.
If an address has already been identified as undeliverable, the system can automatically exclude it from new mailings, marking the address as "Bounced" and preventing further attempts to send to mailboxes that have already returned delivery errors.
This verification process pertains solely to the technical ability of the email address to receive emails and does not involve the sharing of data, content, or Contacts information Contacts different accounts.
Inactive)
Featuring the symbol . This is a A valid email address that no longer receives messages. It could be:
-
It has automatically become inactive.
An email address becomes inactive when it does not interact with your communications. Specifically, Artshell automatically changes the status from Active to Inactive if the contact does not open 20 consecutive emails from you. This can also happen if the user’s inbox has not been opened for a long time: Artshell then automatically “deactivates” the contact to avoid sending emails to unused inboxes.
-
It has been manually deactivated.
If you click the icon you can turn it into an icon with an empty circle ( ). This is useful when a single contact has multiple email addresses associated with them, and you don’t want the contact to receive the same newsletter at every email address when you send it.
To enable or disable idle mode, click the icon so that it becomes a circle with a checkmark (Status: Active).
If a contact is inactive, the system will NOT send them newsletters, even if they are included among the recipients of a message.
However, you can send emails to inactive addresses if you are sending a single email, meaning the address is the only recipient.
Unsubscribed)
Featuring the symbol . These are the email addresses of users who have decided to unsubscribe from your mailing list by clicking the "unsubscribe" link at the bottom of all emails sent via Artshell.
A contact who has unsubscribed:
- It is not deleted from your Artshell account, but remains in your address book with the status "unsubscribed."
- You can receive individual emails if you are the only recipient.
Click the boxes to expand them and see the answers to the questions:
Can I change the unsubscribed status and reactivate a subscribed email address?
The status cannot be changed manually by the user. However, if the recipient has explicitly requested explicitly to be re-subscribed—for example, because they unsubscribed by mistake or wish to receive your communications again—you can update the status and set the address to “subscribed” again.
In that case, ask the contact to subscribe to your newsletter again:
- Select theicon at the bottom right.
- Select the " Newsletter Sign-up Form" option.
- If you haven't activated it Enable the newsletter subscription form by flipping the switch .
- Click the link in the " Link " field of the sign-up form to copy it, then send it to the contact who wants to subscribe to your newsletter again.
Can I remove the "Unsubscribe" link from my Artshell emails?
No, it’s not possible, and for very good reasons:
- It is required by law: many jurisdictions, including the European Union under the General Data Protection Regulation (GDPR), require that email marketing communications provide a simple way for recipients to withdraw their consent. In Italy, the Personal Data Protection Code also requires that an opt-out option be provided.
- Failure to provide an unsubscribe option may result in severe penalties.
- This is a best practice: it helps build trust with your Contacts reduces the likelihood of your emails being marked as spam.
For more information, check out this article from Iubenda.
How to search for Contacts status
Using the search function in the Contacts section, Contacts filter Contacts the status of their email addresses using the following search syntax: click the icon At the top, select your carrier is: and then select one of the options active, inactive, bounced, or unsubscribed.
Conclusions
Now you can start building your mailing list and sending engaging newsletters to your subscribers. Remember that a well-designed form is the first step toward effective communication.
Don’t forget to regularly check the status of your Contacts to ensure that your emails reach only those who are genuinely interested in your content. This not only improves your reputation as a sender but also helps you comply with anti-spam regulations. Below are our tips on how to prevent your messages from ending up in the Spam folder: