The "Details" tab under "Artists"
Introduction
This article explores the advanced features of the Artists section, guiding you beyond simply adding and organizing artists.
Using the Details tab, you can enrich each record with additional content, such as files, images, videos, folders, and attachments, and view the artist’s Artworks in the Artworkssection.
Prerequisites
This article explores advanced features. To make sure you have all the necessary basics covered, we recommend that you review the following articles first:
- Medialibrary Library
- Introduction to the Artists Section
- Folders and Attachments: structure, use, and management
The Details tab
The "Details" tab contains additional information related to an record , such as:
Select an artist and click the " Details " button in the upper-left corner of the record.

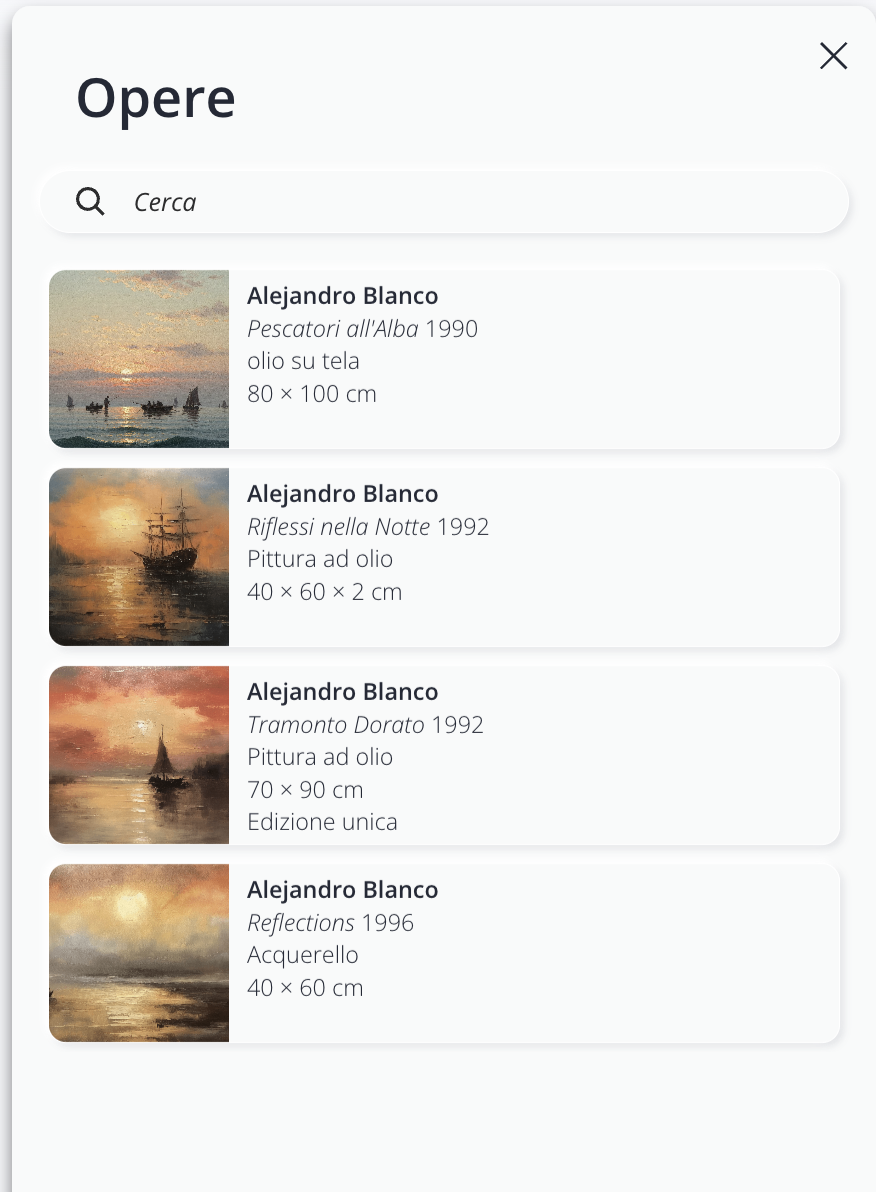
Artworks
The Artworks tabwithin an record automatically displays all the Artworks the Artworks section Artworks which that artist is listed as the creator.
This section is populated automatically: you cannot manually add or remove Artworks.
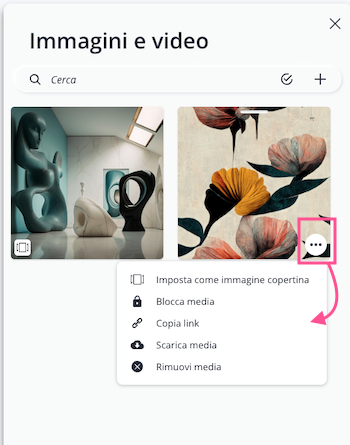
Images and videos
In the " Images and Videos " section, you'll find all the multimedia content associated with your record .
For example, you can uploadphotos of the studio,portraits of the artist, or avideo of the artist creating their Artworks.
In this section, you can:
- Search for content using the search bar.
- Add images or videos from Medialibrary by clicking the icon .
- Select multiple media items using the selection icon .
- Manage individual media files or multiple selections.
Managing a single media file
By clicking on an image or video, you can open the content and view its details, such as the file name, the video link ( if the media is a video), the description, any notes, and the language set at the time of upload.
The "Description " and "Notes" fields in this section are different from those in Medialibrary, so the content does not overwrite each other.

The description entered here appears alongside the image when it is shared and can be used, for example, to provide photo credits. The "Notes" and "Type" fields, on the other hand, are always private: they are visible only within your account and are never included in shared posts.
By clicking the icon You can open the options menu in the upper-right corner of the media.
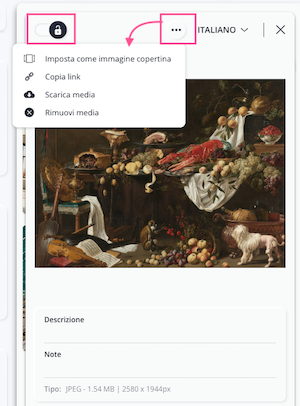
At the top of record also find the lock icon and the X icon to return to the full media view.
The management menu is also available in grid view, again via the icon .
Manage a media library
To manage multiple images or videos at once, click the selection icon and select the media you want to edit. Once you've selected them, click the icon to open the options menu. The selected action will be applied to all selected items.

Note: Removing an image or video from the Images and Videos section does not delete it from Medialibrary.
Folders
The"Folders"section expands on the information in record , allowing you to upload and link additional data, images, files, and videos. It is ideal for attachingextended biographies,critical essays,press reviews,representation contracts,administrative documents,curatorial materials, orpresentation dossiers.
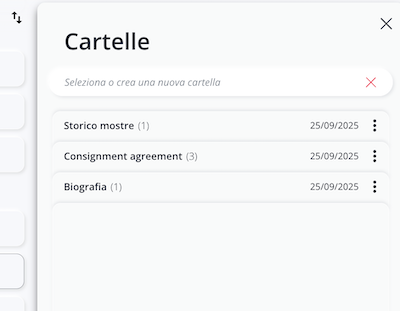
Below is an example of the folders within an record .
If this is your first time using folders, we recommend that you first read the article titled "Folders and Attachments: Structure, Use, and Management" so you can set up the main folders you might need in advance.
For your convenience, here is a summary of the main features, such as how to create a folder and add an attachment.
To create a new folder:
- Select the record .
- Open the Details tab and select Folders.
- Click ➕, type the name of the new folder into the search bar, and click Create.
- If you plan to share the content with an international audience, include the folder name in the other available languages as well.
- Click " Create " to finish.

To add attachments:
- Open the folder and click the ➕.
- Enter a title, text, or multimedia elements (images, videos, or files) or graphics (separators or sliders), the date, and translate the content using the multilingual feature if you think it’s necessary.
- Click Save to update the contents of the folder.

Returning to the list of folders, you can view some useful information:
- The number next to each title indicates the number of attachments in the folder.
- The date on the right indicates when the folder was added to the record.
- The icon allows you to move attachments to another folder or delete the folder itself.
Warning! You cannot delete a folder that contains attachments. To delete the folder, first move all the attachments to another folder.
Managing attachments
Within folders, attachments can be: locked using the lock feature, moved to other folders, or deleted.

File
In the " Files " section, you'll find all the files associated with record .
Within the Files section, you can:
- Search for a file using the search bar.
- Click the ➕ icon to add new files. You can upload any type of file (e.g., .zip, .mp4, .docx, etc.) with no restrictions on format or size. You can also attach documents generated using Artshell’s export features.
If the file you want isn't already in the Medialibrary, click the ➕ icon again to upload it directly from your computer.

Before you begin uploading files, the system will display a record each file, where you can add a description and notes in three languages (Italian, English, and French). The file name, however, remains the same in all three languages.

You can further manage your files using the icon , specifically, you can:
- lock a file using the lock icon;
- copy the link, download it, or remove it from record .
If you remove a file from record file will still remain saved in Medialibrary. You can also perform these same actions by opening the file.

Conclusions
The advanced features of Artshell's Artists section significantly streamline the management of your collection. Using these tools allows you to organize your artist archive more efficiently.