Introduction
This article guides you through all the steps needed to add an artwork from scratch, edit or delete an existing one. Here you can also find the explanations of the available fields you can use to catalog your artworks in Artshell.
Add an artwork
Step 1: Create a new card
Click the icon in the top right corner to open the artwork card (the window on the right), where you can enter the artwork's information.
You don't have to fill in all the fields in the artwork card. You may fill in only those you need or are most interested in and add further details later on.
Step 2: Fill in the fields
Below you can find a list of all fields in the artwork card.
Click each section to expand and see further details:
Images
Use this field to add images to the artwork.
Click
Add and select the image you wish to include in the artwork card, then click
Add again. Repeat the action if you have several images of the same work. For a more detailed explanation or if you have not yet uploaded images to the Medialibrary
click here to read the dedicated article.
Artist
This field allows you to associate an artist to the artwork. Click
Choose an artist and type in the first or last name initials of the artist, then select it from the drop-down menu. If the artist has not yet been entered into Artshell click the
+ to create the artist card.
Click here to read the article on how to add artists.
Title, Year, Technique
Title: Add the title of the artwork.
Year: Enter the year or period in which the work was realised. You can also enter date ranges or centuries or approximations.
Technique: Specifies the technique or materials used to produce the artwork.
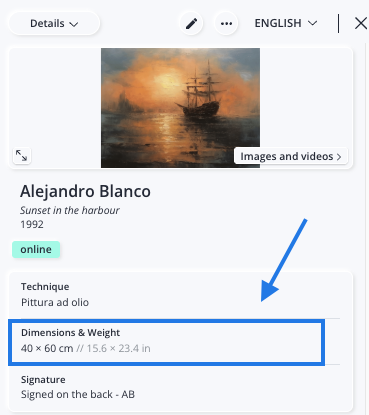
Dimensions & weight
Here you can enter the dimensions and weight of the artwork. You can detail height, width, depth and diameter and use the description field to specify dimensions of more complex works such as installations, diptychs or triptychs, for which one set of fields is not sufficient.
Note: Within the artwork’s detail page, Artshell automatically converts measurements between
centimeters and inches (cm/in) and between
kilograms and pounds (kg/lb), allowing you to view both unit systems.
Edition
Enter the edition number of the work, if present.
Signature
Here you can specify whether the artist's signature is present and where it is located in the artwork.
Add tag
The Tag field allows you to create tags useful for describing works and grouping them together.
Click here to read the article on tags for artworks.
ID and Status
ID: is the inventory number specific to each collection. Artshell does not assign an automatic ID to each uploaded work, this allows you to use the criteria you prefer.
Status: drop-down menu that allows you to choose between 3 different statuses for the work: Available, Reserved or Unavailable.
Location
With this field you can associate a work with a contact that indicates the location of the work.
You can update the artwork valuation while maintaining the chronology of changes: if you receive a new valuation for a work you can add the new value without changing the previous one. This feature is available both for individual works and for massive updates.
Click here to read how to use the History feature.
Price
In this field you can enter the price of the work, specifying the currency, the presence or absence of VAT, and the possibility of indicating a descriptive note.
You can update the artwork valuation while maintaining the chronology of changes: if you receive a new valuation for a work you can add the new value without changing the previous one. This feature is available both for individual works and for massive updates.
Click here to read how to use the History feature.
Acquisition
You can update the price of a work while maintaining the history of changesHere you can enter the data related to the acquisition of the work. The cost, with the presence or absence of VAT, the date of acquisition, the provenance and the possibility of indicating a descriptive note.
You can update the artwork valuation while maintaining the chronology of changes: if you receive a new valuation for a work you can add the new value without changing the previous one. This feature is available both for individual works and for massive updates.
Click here to read how to use the History feature.
Insurance
Here you can enter all the details about the insurance such as the cost, the period the work is insured, who the insurer is, the policy number, and any other descriptive notes.
You can update the artwork valuation while maintaining the chronology of changes: if you receive a new valuation for a work you can add the new value without changing the previous one. This feature is available both for individual works and for massive updates.
Click here to read how to use the History feature.
Evaluation
In this field you can file the appraisal and evaluation of the work, indicating the expert and the date on which the evaluation was made.
You can update the artwork evaluation while maintaining the chronology of changes: if you receive a new appraisal for an artwork you can add the new value without changing the previous one. This feature is available both for individual works and for massive updates.
Click here to read how to use the History feature.
Property and collection
You can use this field to add details about the ownership of the artwork and which collection it belongs to.
Certifications and rights
With this field you can add details of the certifications that the artwork has, whether they are special restrictions, applied by the Superintendency, resale or copyright, SIAE or photographic copyrights
Framing, packaging and quantity
Maximum dimensions: this section is useful for specifying the dimensions of the work with any support or frame, when these are not an integral part of the artwork. You can enter the height, width, depth, diameter and weight.
Conservation status: a drop-down menu from which you can select whether the state of the artwork is Excellent, Good, Fair or Very Bad.
Packaging: here you can specify the details of the work's packaging, the dimensions of the crate, the number of packages or other descriptive notes.
Quantity: drop-down menu from which you can choose the medium. You can start typing the first few letters of the medium of interest to facilitate your selection.
Note
Here you can enter any other notes relating to the artwork.
Add document
Here you can add all the documents related to your artwork.
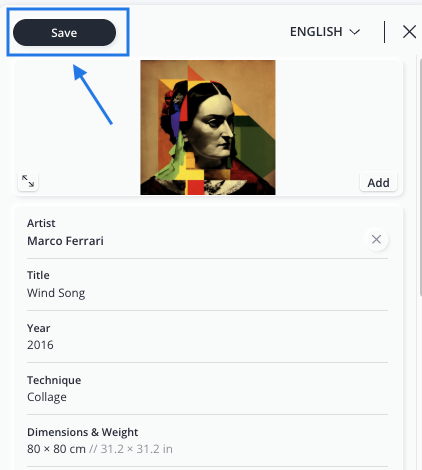
Step 3: Save
Once you have added all the necessary details, click Save at the top left of the artwork card.
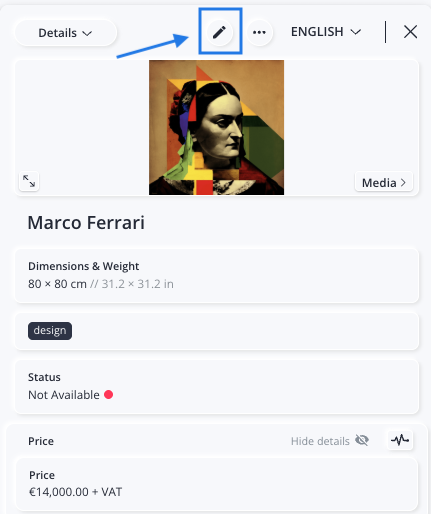
Edit an artwork
To edit an artwork you have already created:
-
Select the artwork you want to edit to open its card.
-
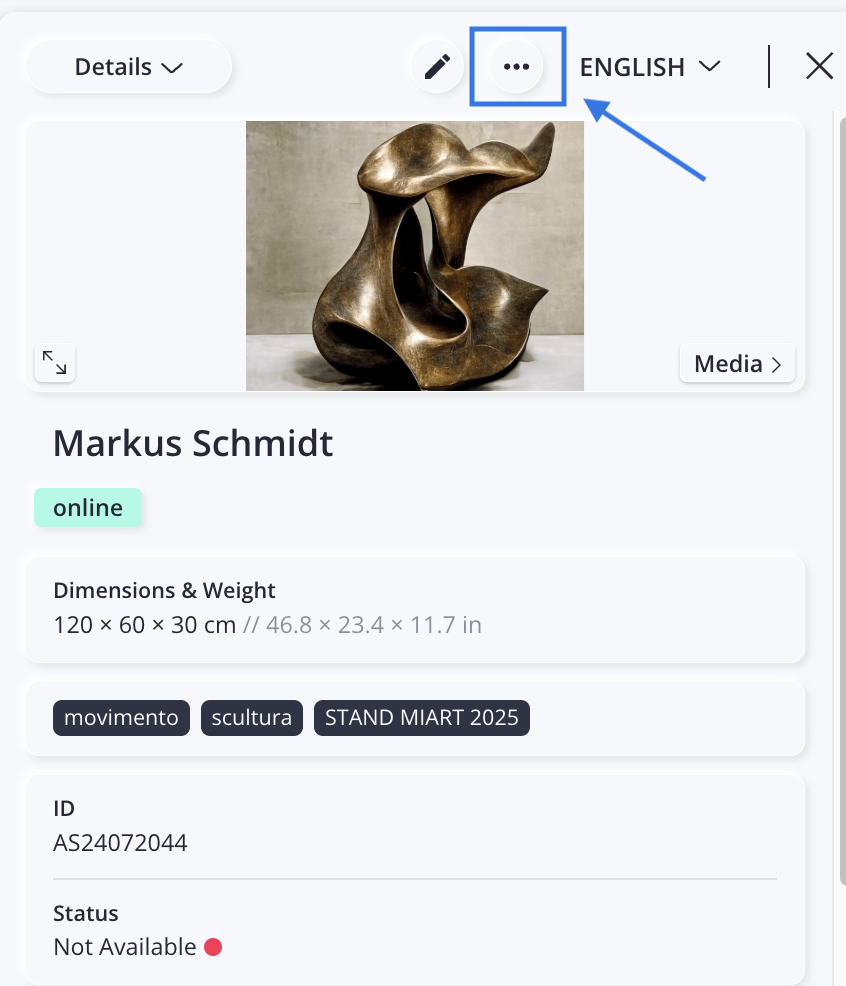
Click the icon to access the edit mode and make the changes you want.
Delete an artwork
Beware: Deleting an artwork is a permanent action, once you have deleted an artwork you cannot go back or recover it in any way. This is why Artshell has inserted an additional confirmation request so that you do not delete works by mistake.
If you want to delete an artwork you have to:
- Select the artwork you want to delete.
- Click the icon.
- Select Delete.
- If you are sure you want to permanently delete the work click Delete. If you have selected another work by mistake click Cancel.
If you want to delete a selection of artworks:
Use the Select function to select your artworks, then click the icon, click Delete selected and then Delete. If you have selected any works by mistake click Cancel to go back.
Here is a brief demonstration:
Conclusions
Managing artwork cards in Artshell is simple and flexible: you can add, edit, or delete artworks according to your needs, filling in only the necessary fields and completing the details at any time. The wide range of available options allows you to catalogue each artwork accurately and in a structured way, while always keeping track of changes thanks to the integrated history.
Discover more features to help you manage your archive by reading the following articles: