
Add an event
Introduction
An event on Artshell includes all the information needed to organize and share an activity, such as an exhibition, a guided tour, a workshop, or a conference.
When creating an event, you can specify dates and times, set participation options, manage reservations, and customize the messages sent to participants.
In this guide, you'll learn how to create a new record and configure its main settings.
Step 1: Create a new record
Click the top right for Create the new record (the sidebar on the right) where you can enter all the information about the event.
Step 2: Fill in the key information
The first sections of the record the event's identifying information.
Image, title, and subtitle
- Image: This is the event cover image. Click "Add" toadd an image and/or choose one from the Medialibrary the image you want to use as the event cover.
- Title: Identifies the event.
- Subtitle: Allows you to add a brief description or additional information.
Tip
If you plan to share the event, use a landscape image in 4:3 aspect ratio, without any text, and with the main subject centered, to ensure it displays correctly on different devices.

Organizer and Curator
Add the contact information for the event organizer and the person responsible for the event's content.
If the contact is already listed on Artshell, you can select it from the list. Otherwise, you can create one directly from record by clicking the +.

Tags
Tags allow you to categorize and organize events, making it easier to search for and group them.
For more information, see the article on how to organize events by tags and lists.
Location
In this section, you can use the toggle switch in the "Event Type" field to indicate whether the event is in-person or online .
In-person event
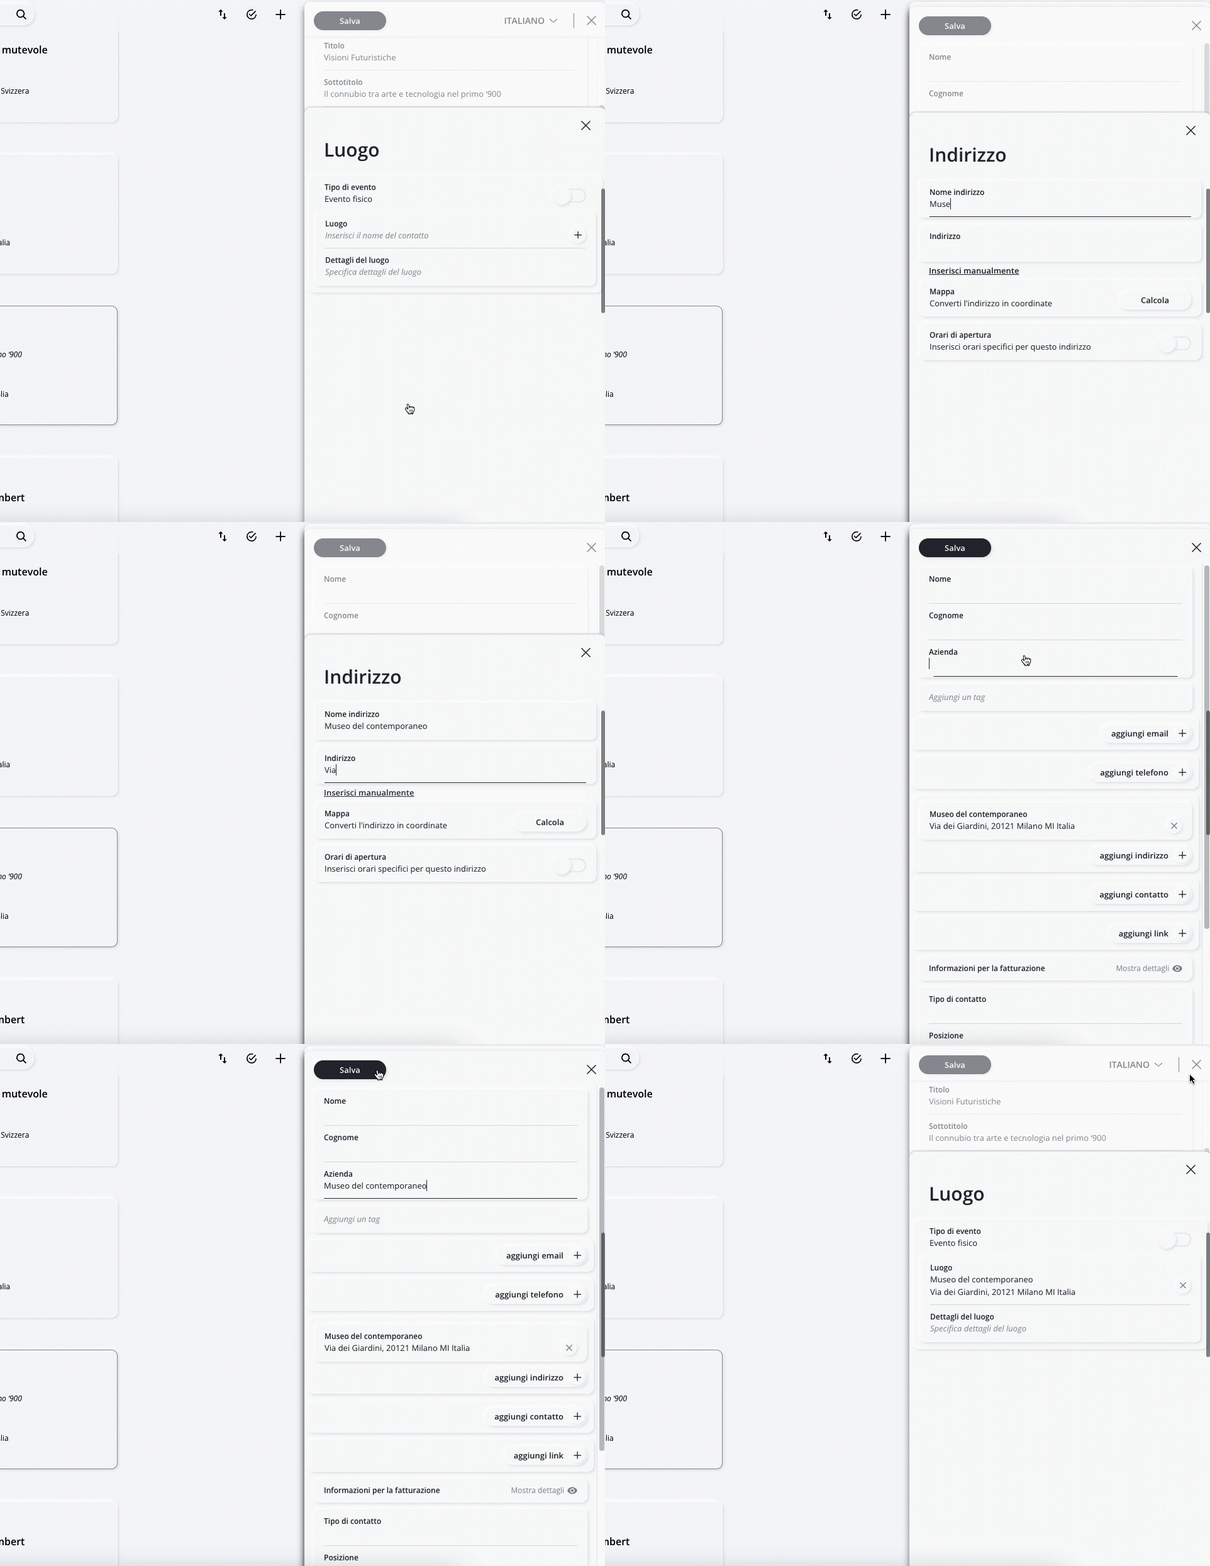
Select a location that's already in your Contacts create a new one by clicking the +.
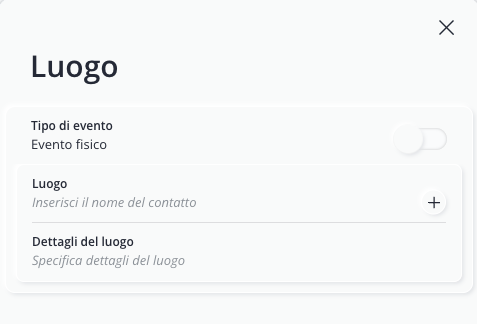
Whether you're creating a new record or selecting an record , always make sure the geolocation is correct:
- check address;
- If necessary, reposition the pin on the map—you can manually correct its location.
Tip
If you frequently host events at your location, it may be helpful to create a record specifically for your organization and use it as the event location each time.
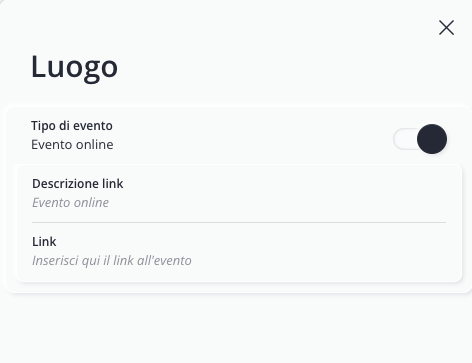
Online Event
For an online event:
- In the " Link Description " field, enter the title of the link;
- In the " Link " field, enter the link to the event (e.g., Zoom, Eventbrite, Wix Events, etc.).
If necessary, you can also specify the time zone in the activity settings. Click theXicontoclose the "Location" drop-down menu and continue filling out the next fields.
Step 3: Set up the event schedule
In this section, you'll specify when the event will take place and how participants can access it. In summary, in this step you need to configure:
Let’s take a closer look at these points:
Dates and Activities
Each event may include one or more activities—that is, specific sessions within the event—such as:
- opening ceremony;
- current exhibition;
- guided tour;
- special opening;
- closing reception.
You can add and customize them by clicking "Add Activity" and repeating the following steps for each activity:
- Activity type: Select the activity type from the drop-down list, or type in the name if the type you're looking for isn't in the list;
- Start and end dates: Enter the start and end dates by selecting them from the calendar;
-
Opening and closing hours: Set the main hours; in the fields below, you can further customize this information by specifying specific hours for each day of the week.
What should you do if the event lasts only one day?Enter the same date in both the "Event Start" and "Event End" fields, or fill in only the "Event Start" field. - Display end time: Choose whether to show the end time to participants. (If you disable this option, users will only seethestarttime.)
-
Admission Options: You can choose from 4 options: free admission, free admission with registration, paid admission, and paid admission with registration.
Note:If you choose theregistration-based admissionoption, be sure to enable the internal booking option in Artshell, or addthe URL to the external registration form inthe "Link" field. If your event requiresa paid admission fee, be sure to indicate this by addingthe URL to the payment pageinthe "Link" fieldor in the"Details" field below. - Details: You can use this field to indicate any closures.
- Opening days and hours (if any): If necessary, specify the opening days and hours.
- If the event is online, please specify the time zone.
Activity attributes
Event attributes are additional labels that you can associate with an event to provide users with quick and easy-to-read information. They’re used to highlight practical or distinctive features of the event. Here are some attributes you’ll find already available in Artshell:
- Easily accessible location;
- Pet-friendly;
- Shuttle service;
- Featured - if you want to give the event more visibility;
- etc...
Attributes help users see at a glance whether an event meets their needs and help make the events calendar clearer and easier to navigate.
Inside the record , you'll find a drop-down list with predefined attributes. If none of the available options meet your needs, you can create a custom one by clicking the icon and by adding a new attribute.
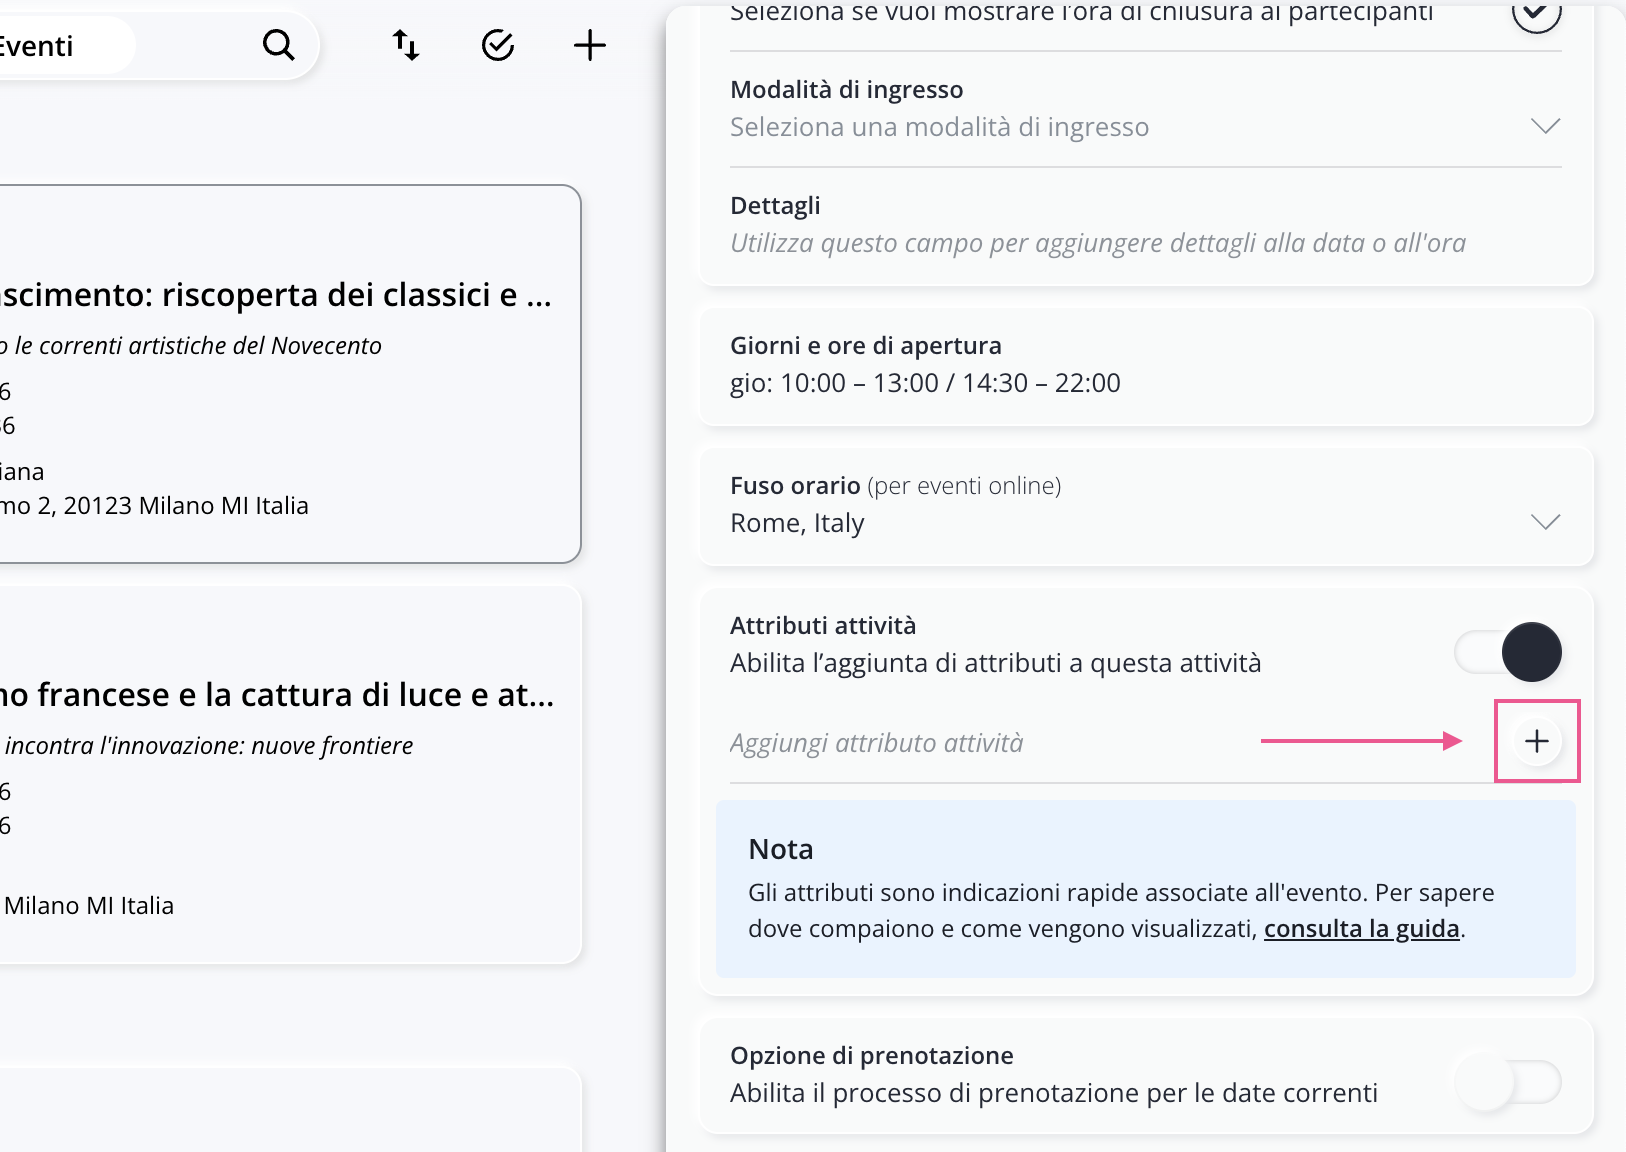
Use attributes consistently and limit their number. This will make the information easier for the audience to understand.
To view and manage all the attributes you've created, open the Settings panel by clicking the icon and select the option Event Settings & RSVP. For more information, see the related article.
Reservation Option (only if you plan to have attendees register upon entry)
If your event requires registration upon entry, enable this option to create a data collection form.
To enable booking, click thetoggle switch to change it from a white dot to a black dot, and then specify:
- The maximum number of participants;
- The frequency of entries;
Frequency:The number of participants is related to the frequency (or time interval). For example: if you set 100 as the maximum number of participants and 30 as the frequency, this means that 100 people can book every 30 minutes. If you want 100 to be the total number of participants for the entire event, selectthe entire period underFrequency.
- Booking cutoff: Specify how long before the start or end of the event you want to close bookings.
- Option to bring a guest: Choose whether each participant can bring a guest.
- Support email: We recommend that you always fill in this field with a support email address that participants can use to contact you with questions or requests. (This address will be visible during registration.)
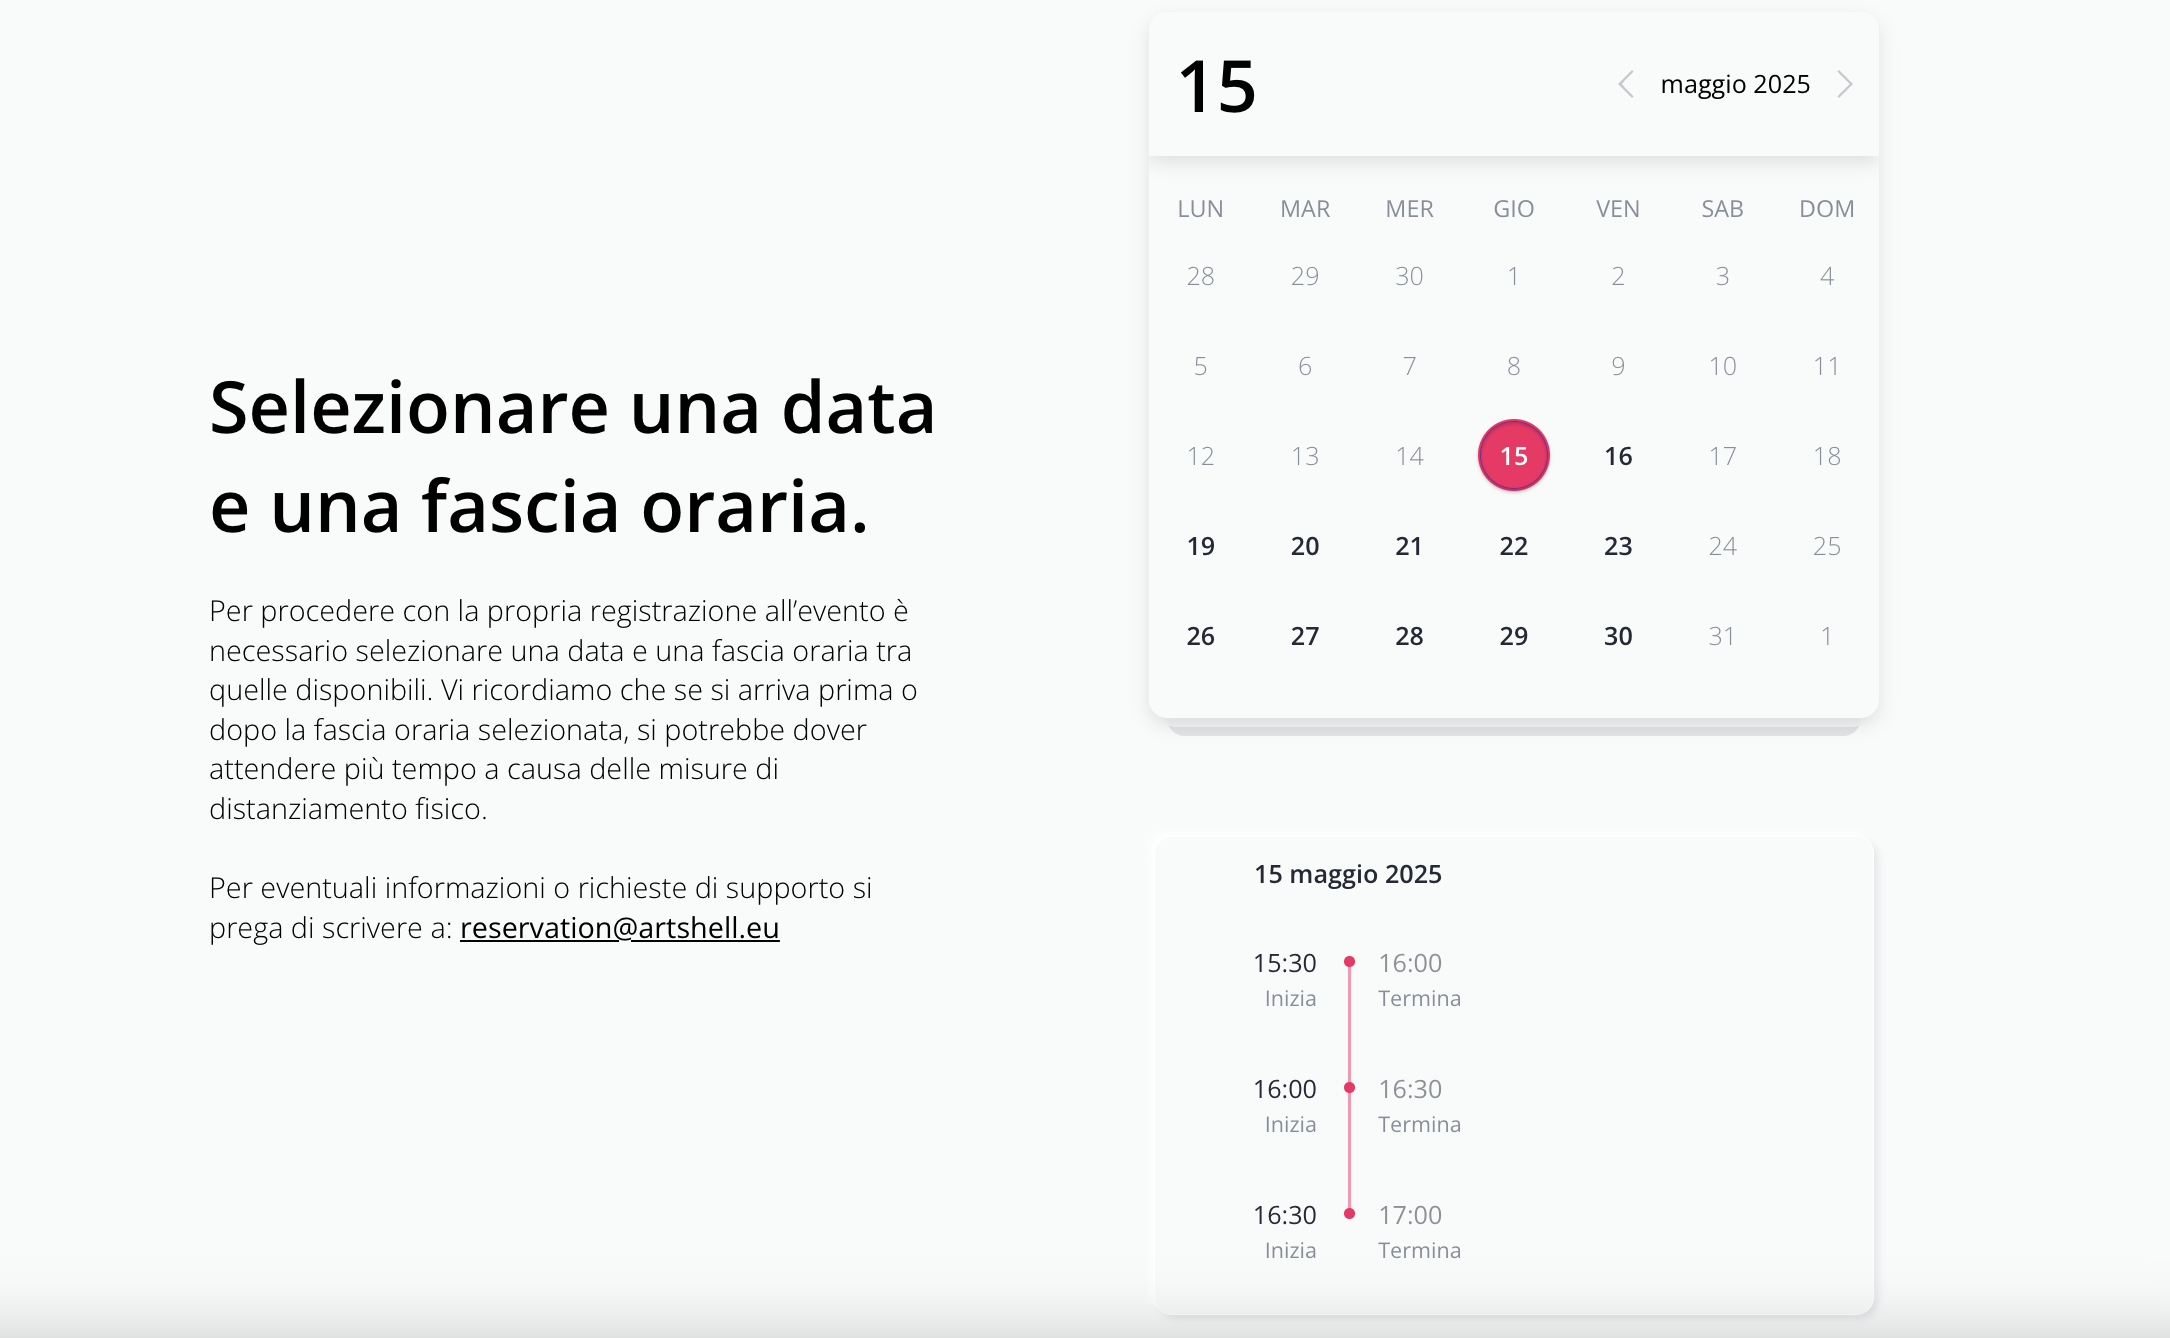
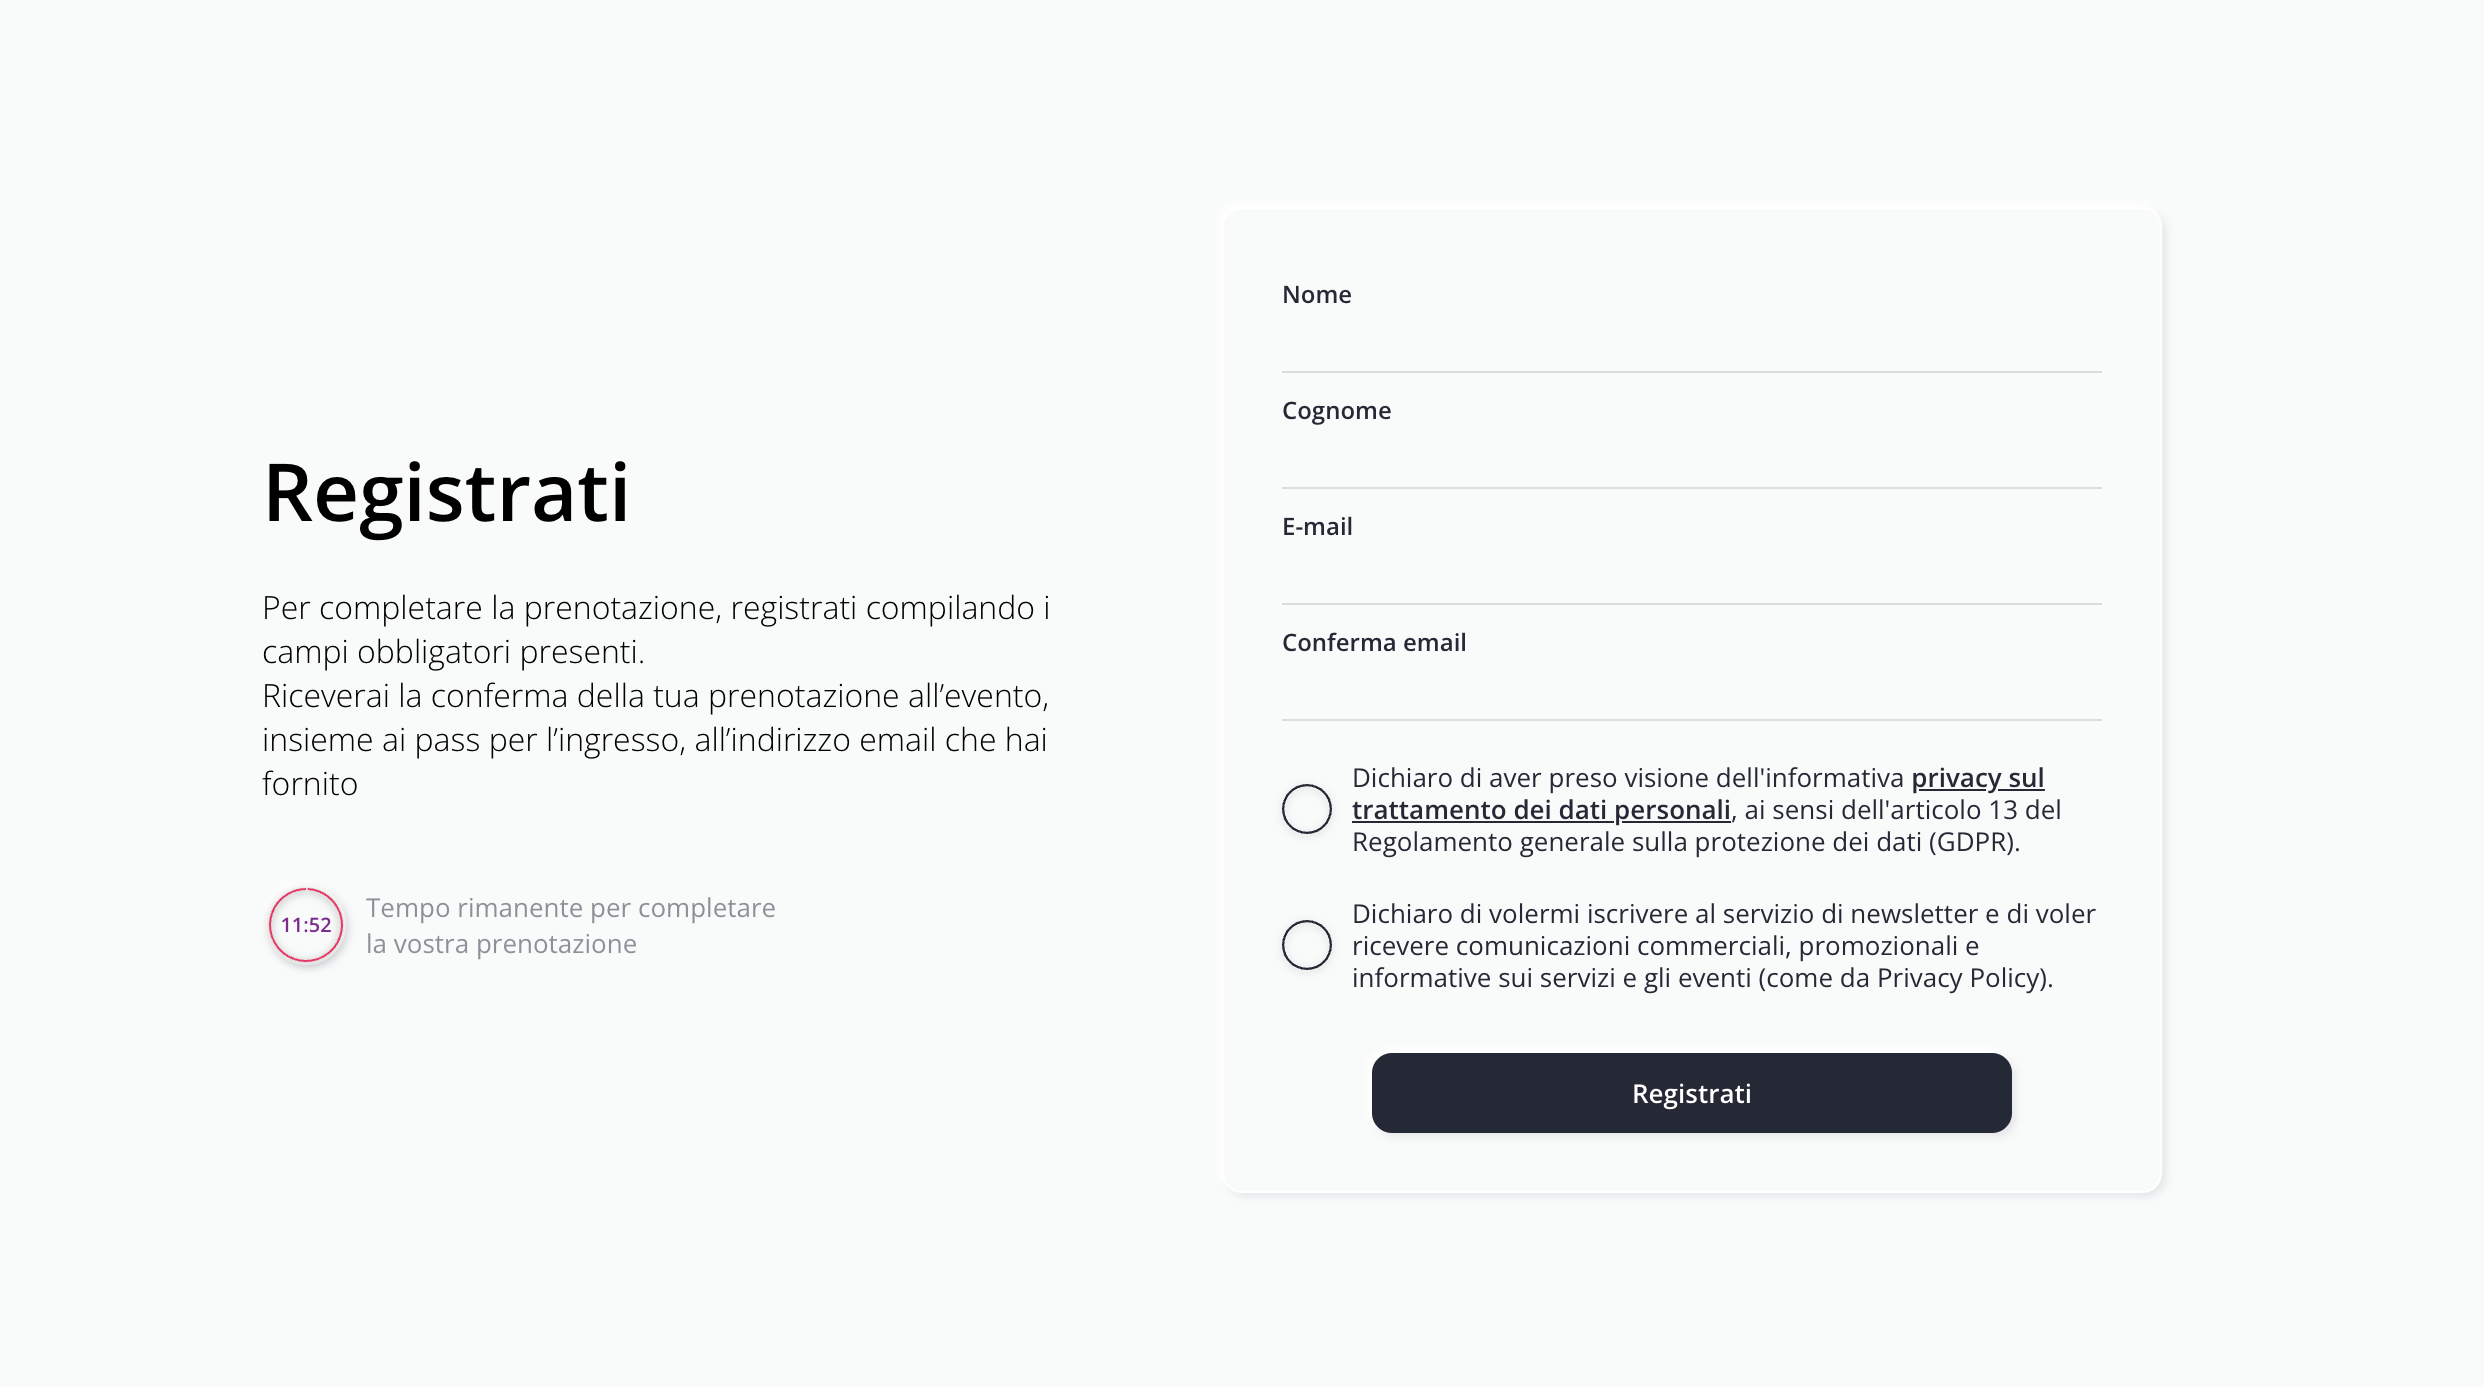
Once you've configured these settings, your event's booking form will look similar to the one shown in the images below:
Event with time slots:
Event requiring reservations throughout the entire period:
In the Booking Options section, you can also set:
Restrictions on participants
You can decide whether to make registration open to everyone or to restrict it:
- to Contacts have a specific tag;
- to users who have a coupon.
Read the detailed instructions on how to set up restrictions
With this field, you can choose whether registration for the event is open to everyone or if you want to limit it to a specific group of participants. To limit recording, click the switch ( ) so that the white dot turns black. You can limit registration to Contacts your Artshell account who have a specific tag, or use coupon mode.
- Filtering by tags: In Add a tag Enter one or more tags. If you enter multiple tags, Artshell uses an OR condition rather than an AND condition, so it includes Contacts have either the first or the second tag, but not both.
What does the user see if you restrict access using tags? During the registration process, the user is asked to enter their email address. At this point, the system checks whether the entered address is in your Contacts whether it has the tag you set as a restriction. If these conditions are met, the system allows the user to register for the event.
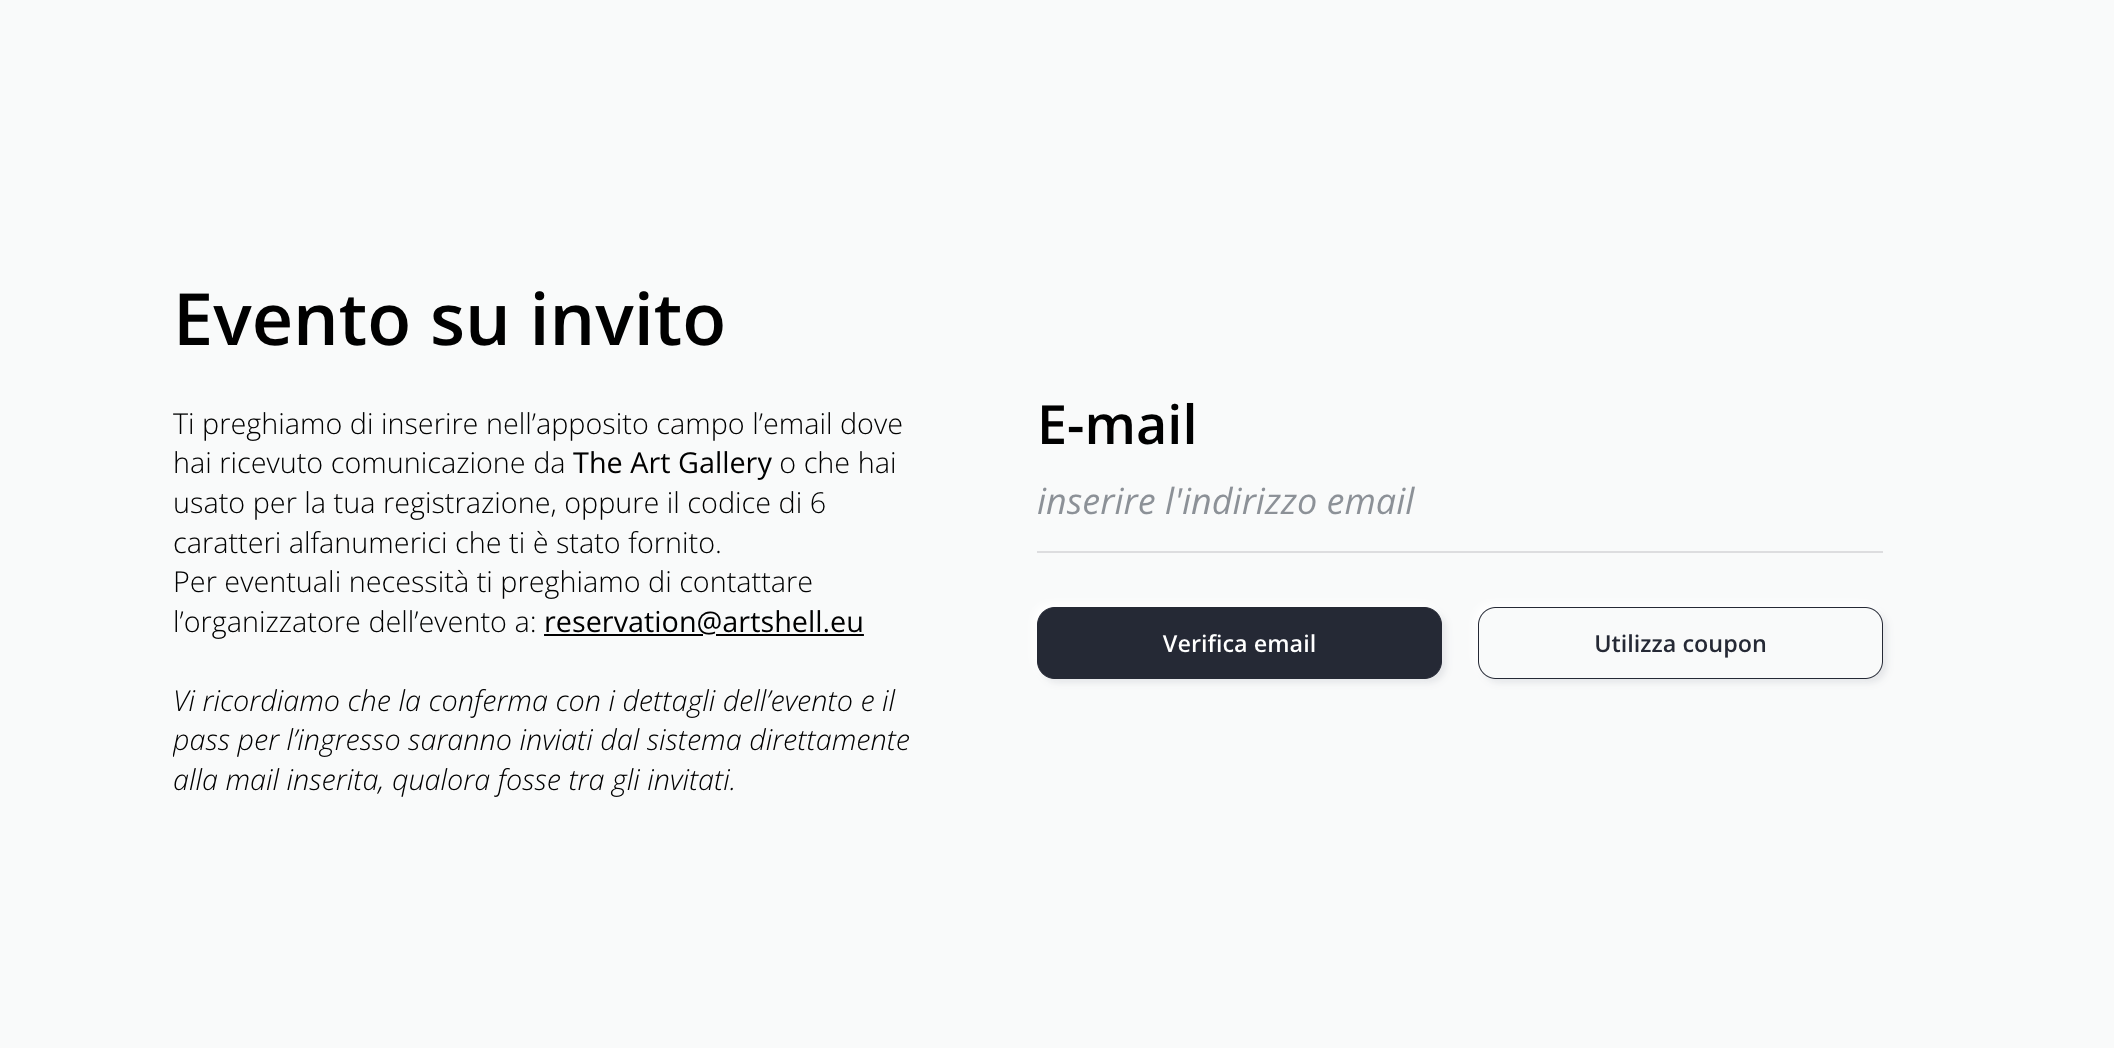
- Limiting via coupons: If you don't want to use tags, you can generate an unlimited number of coupons to assign to guests. You can enter a description (for example, who the coupon is for) and a limit (how many people to assign it to).
Click the X icon to close the participant restriction section and continue filling out the following fields.
Confirm reservation
When a user registers for your event, Artshell automatically sends a confirmation email and a reminder the day before. In this section, you can customize the sender, text, graphics, and buttons for both emails, add a downloadable passbook to the email, and send a test preview before publishing the event.
Read the detailed instructions on how to set up booking confirmation emails
Confirmation and reminder emails
When a user registers for your event, they automatically receive a booking confirmation email and then a reminder email the day before the event. In this field, you can customize these two emails:
- Sender's email address: If you have registered multiple sender email addresses on Artshell, you can choose which address to use to send the confirmation email.
Note: If the email address you want to use does not appear in the drop-down list or cannot be selected, you must verify that it has been entered and enabled as a sender address. Read the article " Verify, add, and enable sender email addresses for your account." - The texts: Enable the toggle to view and/or edit the text of the two emails. Currently, there are two standard texts generated by Artshell: Title and Subtitle. Click on each one to customize them as you like. Click the button send test and enter an email address to see a preview of how your emails will look. When entering the address, select the contact from the drop-down list or click the + to add it.
Note: If you delete the entire Subject or Subject Line in confirmation and reminder emails, be sure to enter text in their place. Otherwise, Artshell will automatically insert the default text again. - Custom button: Enables the option to add text and a link to the button.
- "Cancel Reservation" button: Toggle this switch to show or hide the button in emails.
- Button style: Change the color of the buttons.
- Email design: Add an image for the header and one for the footer of your emails.
- Event image: Upload a custom image for the event, which will be visible only in emails.
- Passbook: With Artshell, you can create passbooks—electronic tickets that users can save in the app Wallet on their Android or Apple device. Toggle the switch to allow registered users to download the e-ticket directly from the email. By selecting the icon You can customize the logo and image in the banner, while the two icons at the bottom let you add additional information or notes to the back of the passbook and change its color. Click Download test to download a trial version of the passbook to your computer.
- Send test: At the bottom of the window, you'll find two buttons to send a test of the two emails to one or more addresses (Test confirmation email and Test reminder email).
Upgrade Email
Enable this email only if you have set up the Artshell Inviter for your event. This notification is sent to guests if their access level is updated (for example, from VIP to VIP PLUS).
For more information about the Artshell Inviter, please contact the Sales team at sales@artshell.eu
QR Code Settings
If your event requires a reservation, you can include a QR code in the confirmation email sent to participants. To do this, enable the " Enable QR Code" option.
Once it's activated, you can configure the following settings.
Validity of the QR code
You can choose how long the QR code remains valid. Use this option if your event lasts more than one day.
There are two modes available:
- QR code valid for one day of your choice: The QR code becomes valid on the day of your first entry. On that day, you may enter and exit freely; however, starting the next day, the QR code will no longer be valid.
- QR code valid for a single entry: The QR code can be used only once. After the first valid scan, it cannot be reused.
Note: The QR code validity setting is available only when the activity frequency is set to "Entire Period." If you have configured a different frequency, the QR code will automatically be valid only during the selected booking slot, and this option cannot be changed.
How is access managed?
Attendance is recorded using the Artshell Scanner app. When scanning a QR code, the operator receives a message indicating whether the scanned QR code is still valid and whether the participant can enter the event, or whether the QR code has already been used or is no longer valid, depending on the configured validity settings.
For more information on how the scanner works and the messages that appear during scanning, see the article The Scanner app.
Edge of the QR code
You can choose whether to add a border to the QR code and customize its color.
Source of the QR code
By default, Artshell automatically generates the QR codes used for registration.
If you use an external system, you can choose to integrate QR codes from that platform.
Step 4: Link additional information
You can complete the record by adding additional content.
Contacts
Associate one or more Contacts the Contacts . These Contacts within Artshell and are not displayed in the publication.
Link
You can add one or more links, for example:
- website;
- Instagram;
- Facebook;
- external recording system.
Each link can be accompanied by a custom label.

Artists, Promoters, and Sponsors
In this section, you can list the artists involved in the event, as well as any promoters or sponsors.
For each field, you can select a record exists in the Artshell database or create a new one directly from record by clicking the + button.

Folders and Attachments
You can add folders, attachments, and additional documentation to make available along with the event. See the article " The Details Tab in Events" for more information on how to create folders and add attachments.
Step 5: Save the event
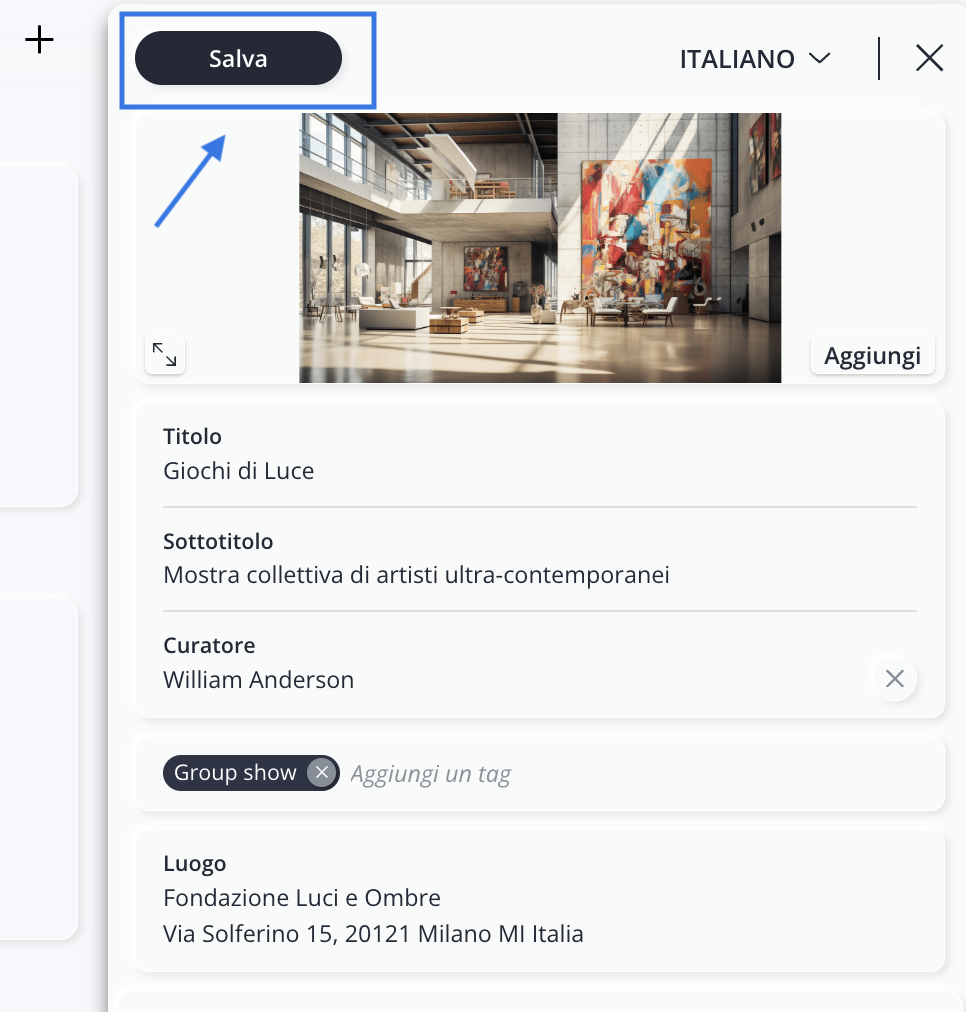
When you're done filling out the form, click " Save " in the upper-left corner.
The event will be added to your archive and can be edited, published, or shared at any time.
Conclusions
The record allows you to gather all the information you need to organize an activity, manage any reservations, and prepare to publish the event—all in one place.
Be sure to check out these upcoming articles:
To find out how to make it visible to the public, see the article Export and Share an Event.